Earlier in the lab, when you created your Site1 fabric, you set Site1's Fabric Settings under Resources to provision VRF Lite externally and also auto deploy both the sub-interface and BGP configuration for external connection. Your border leaf and external router, as you saw when you created your ExtL3 fabric, have detected each other, so the now the provisioning of the sub-interface (with IP address) and BGP configuration can occur to both.
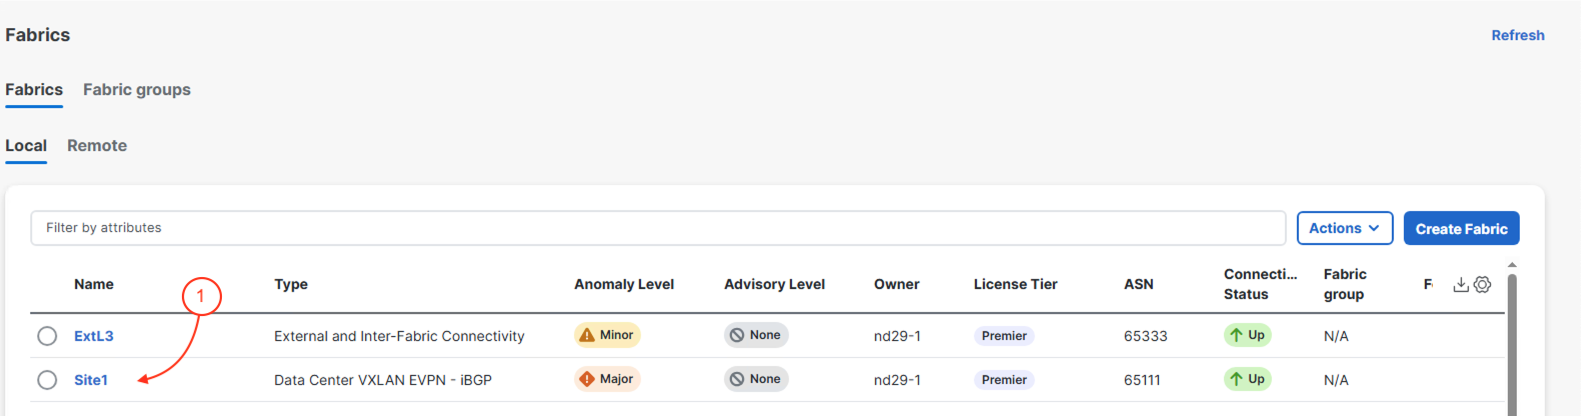
Navigate back to your Site1 fabric (You could leverage the Manage Icon on the left naviagtion bar to go back to the list of fabrics):

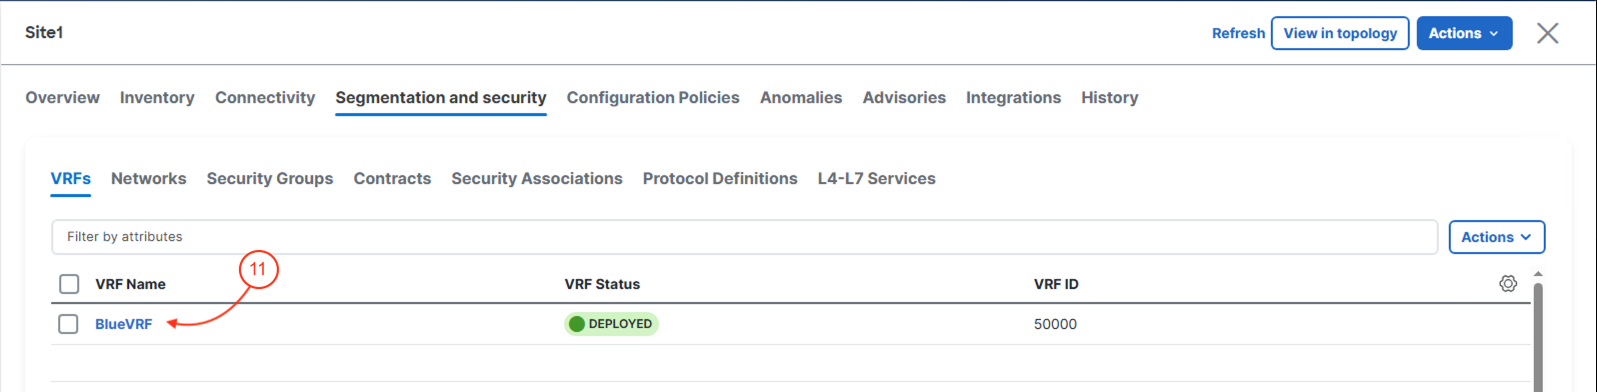
Because we now want to extend your tenant overlay externally out of your Site1 fabric, you need to return to VRFs and deploy your BlueVRF to your Site1-BL1. Previously, you only deployed this VRF to your Site1-L1 and Site1-L2 through the attachment of two Networks.
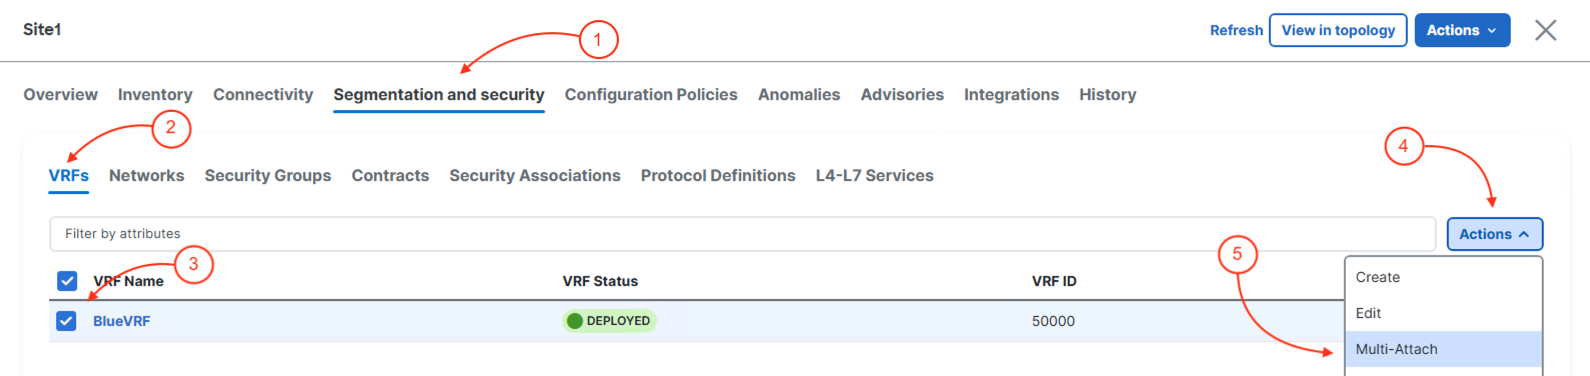
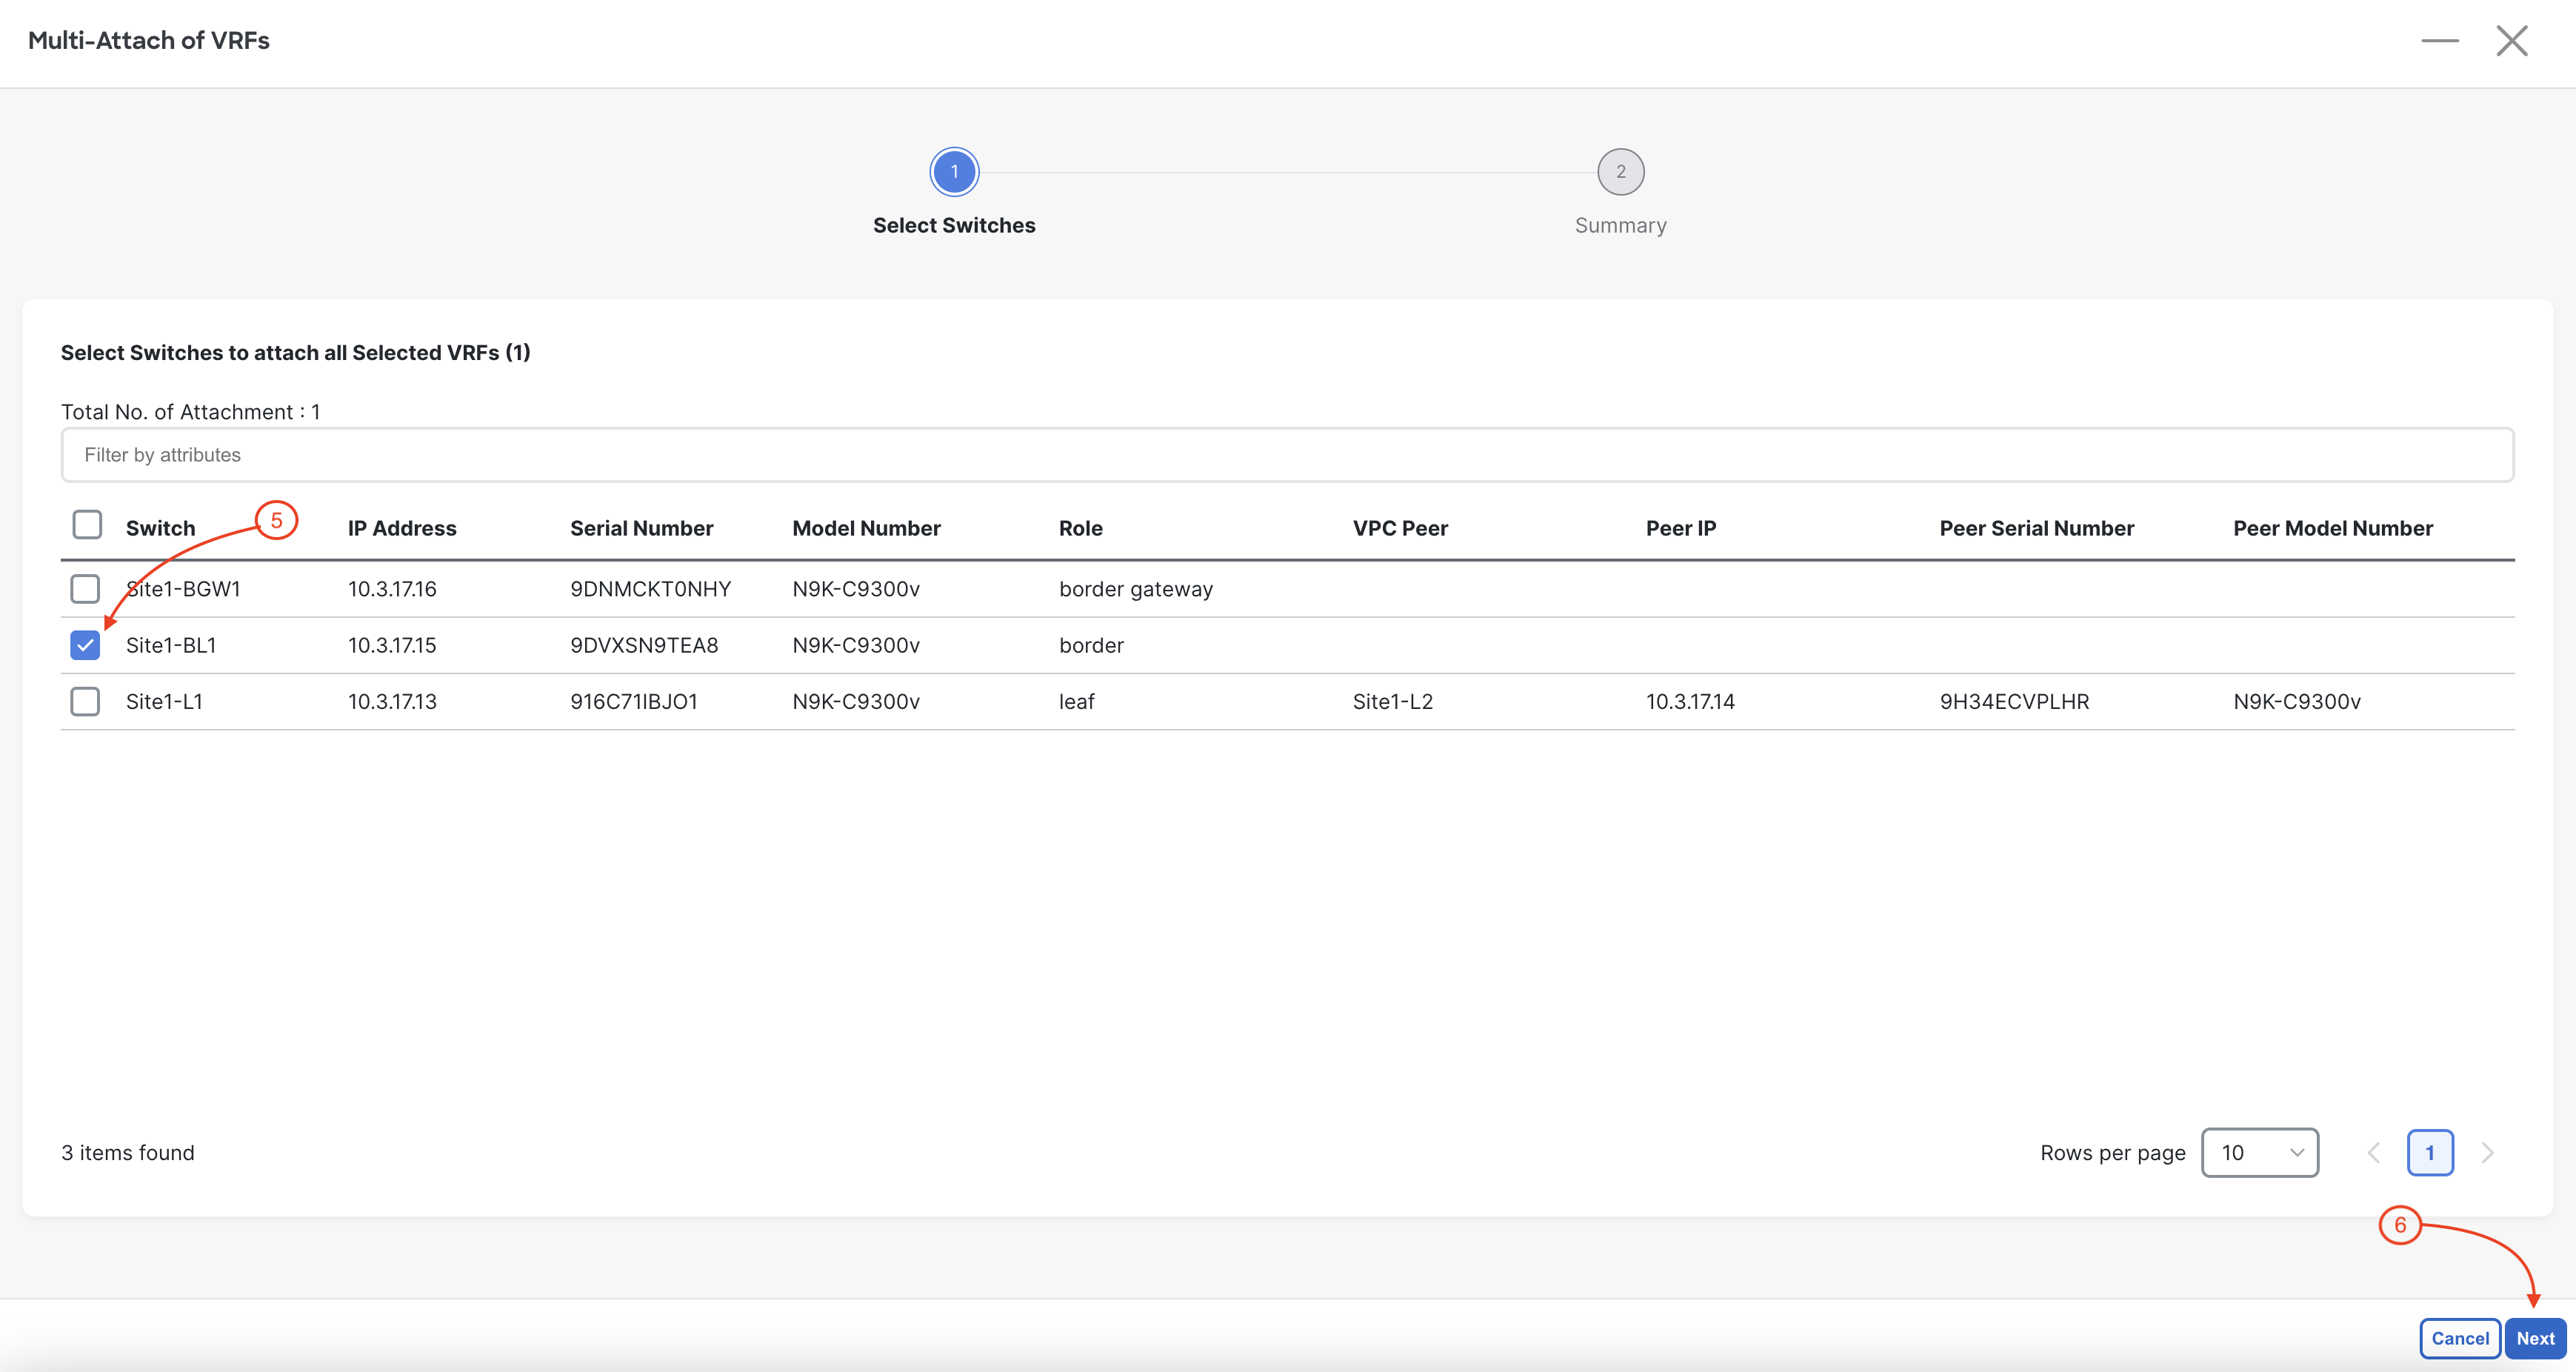
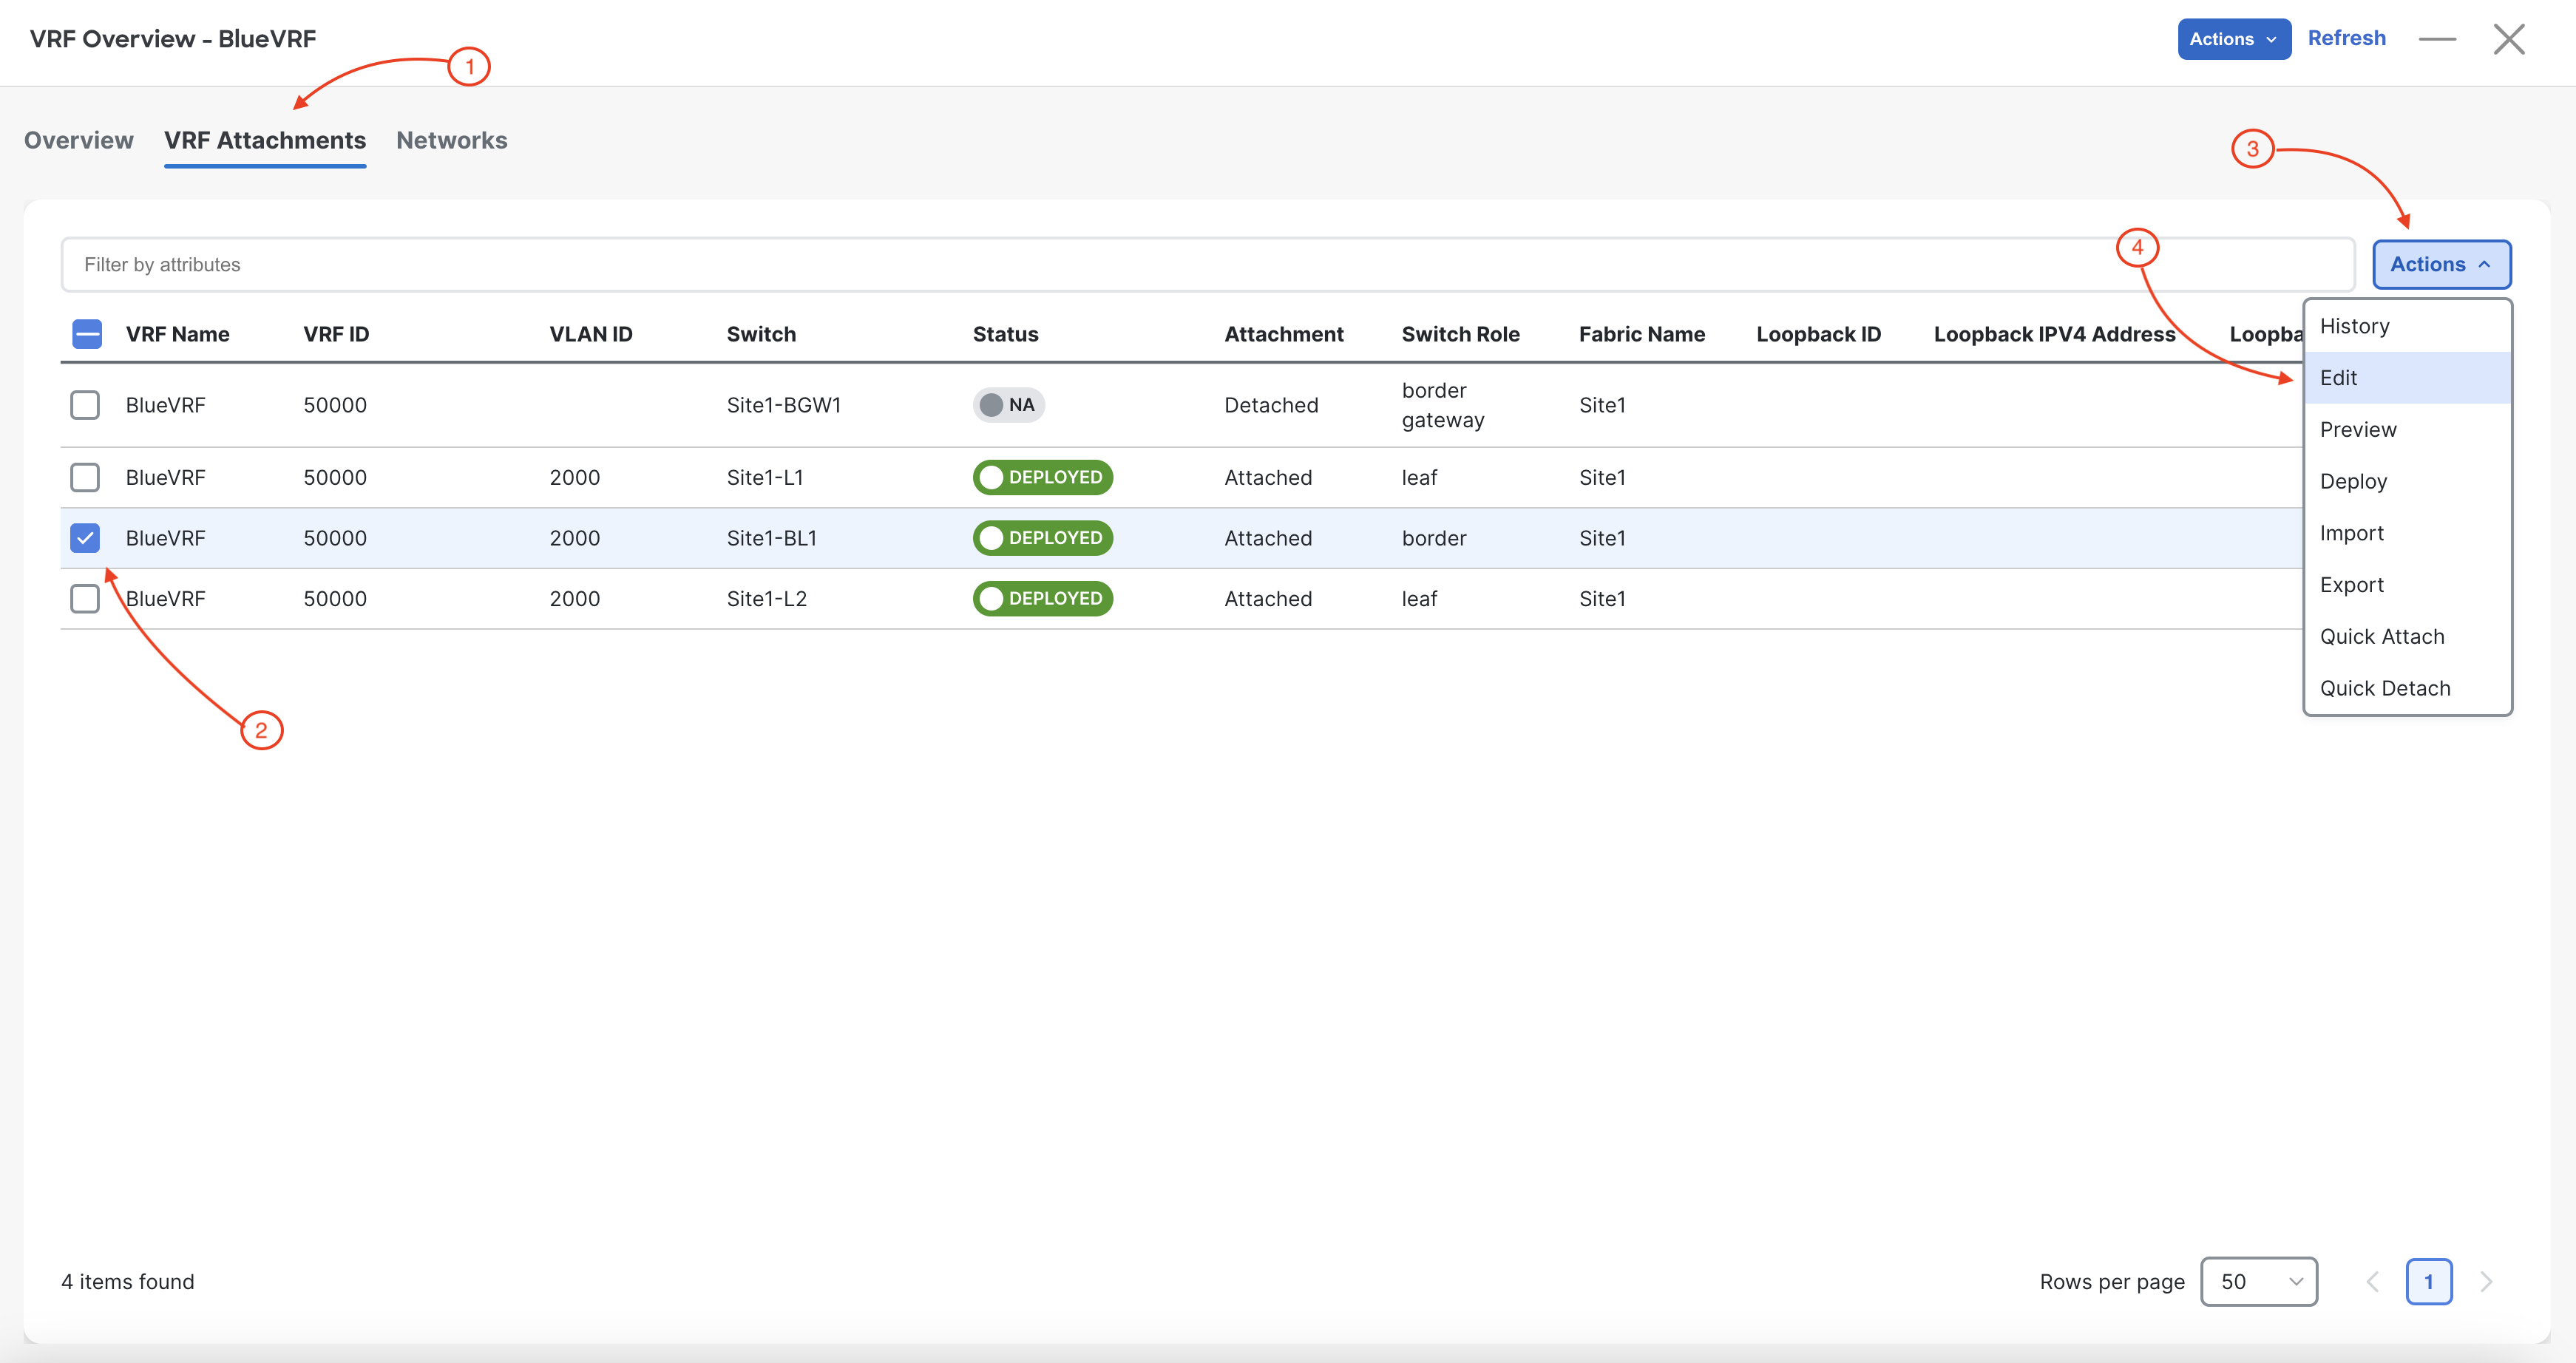
You need to select your Site1-BL1 to attach the BlueVRF:
In the Edit VRF Attachment wizard:
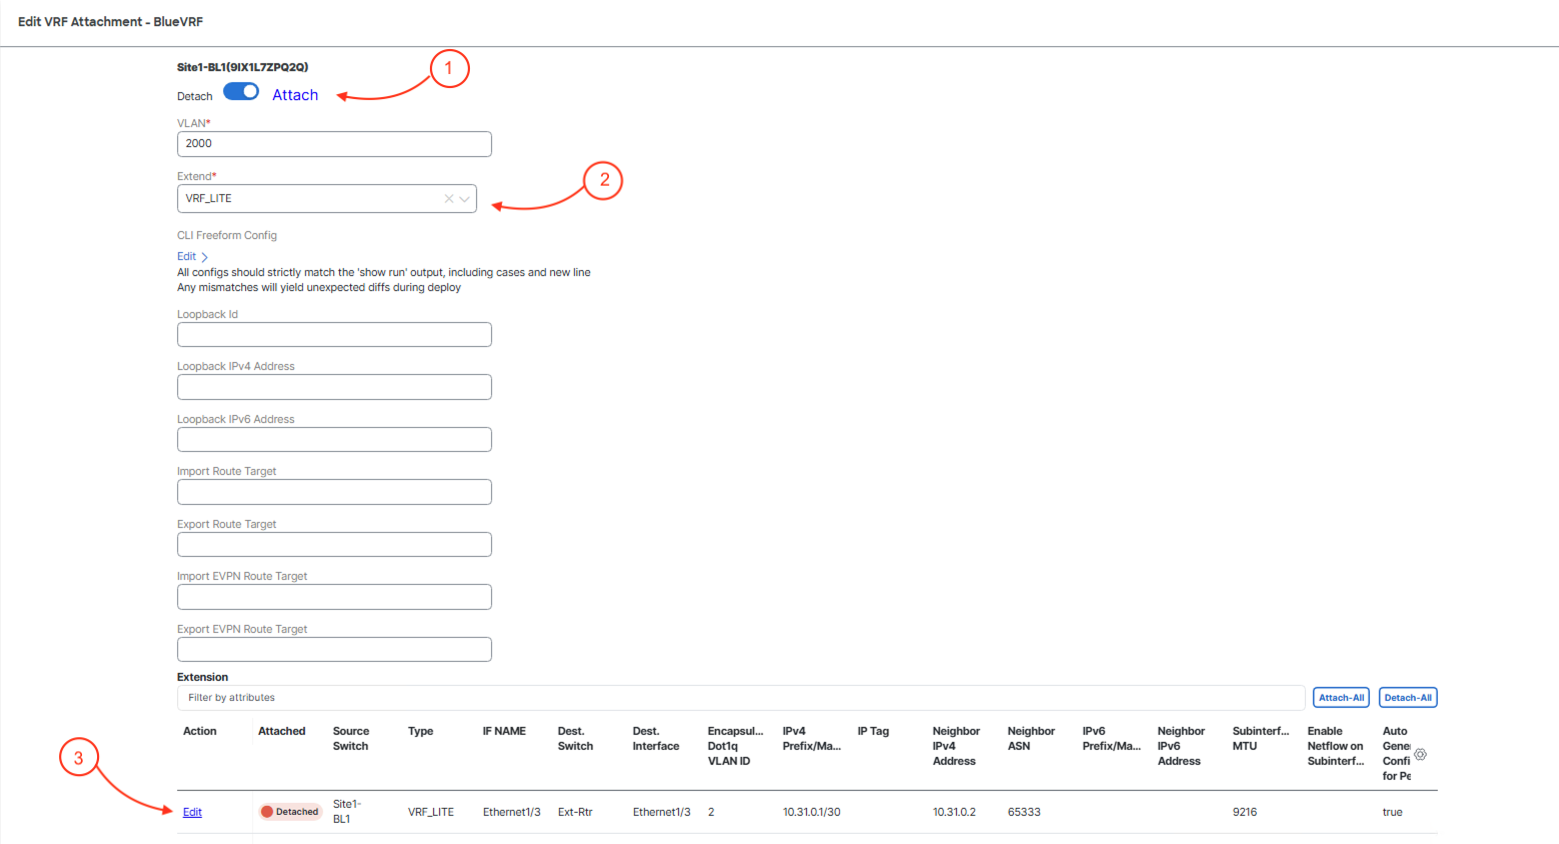
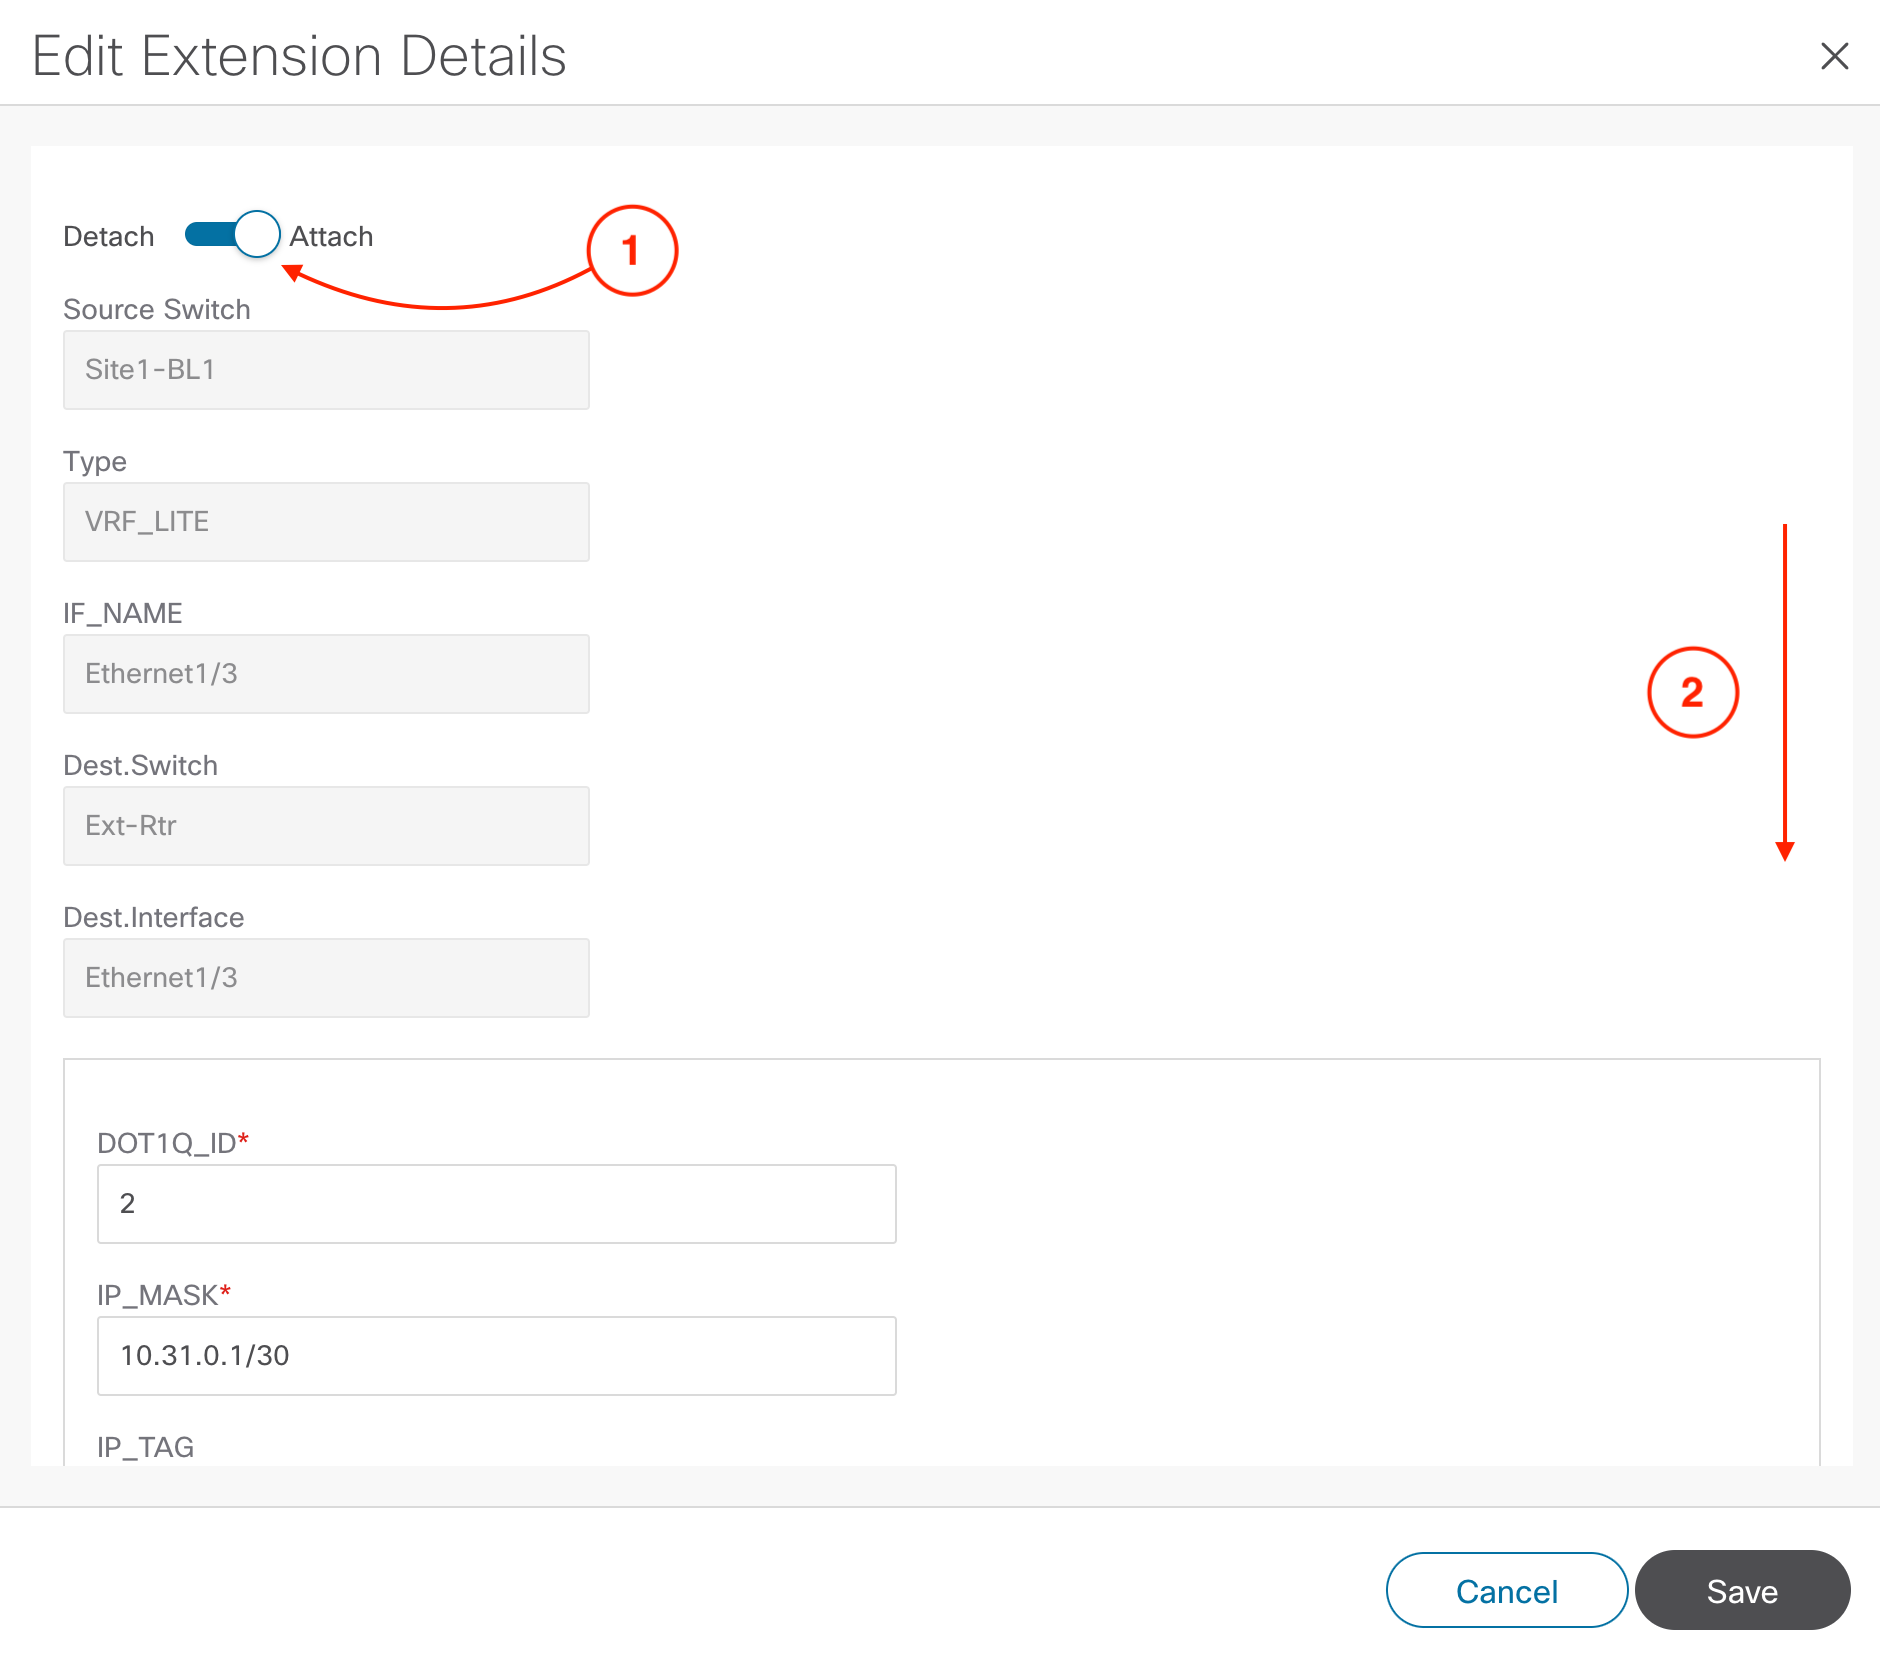
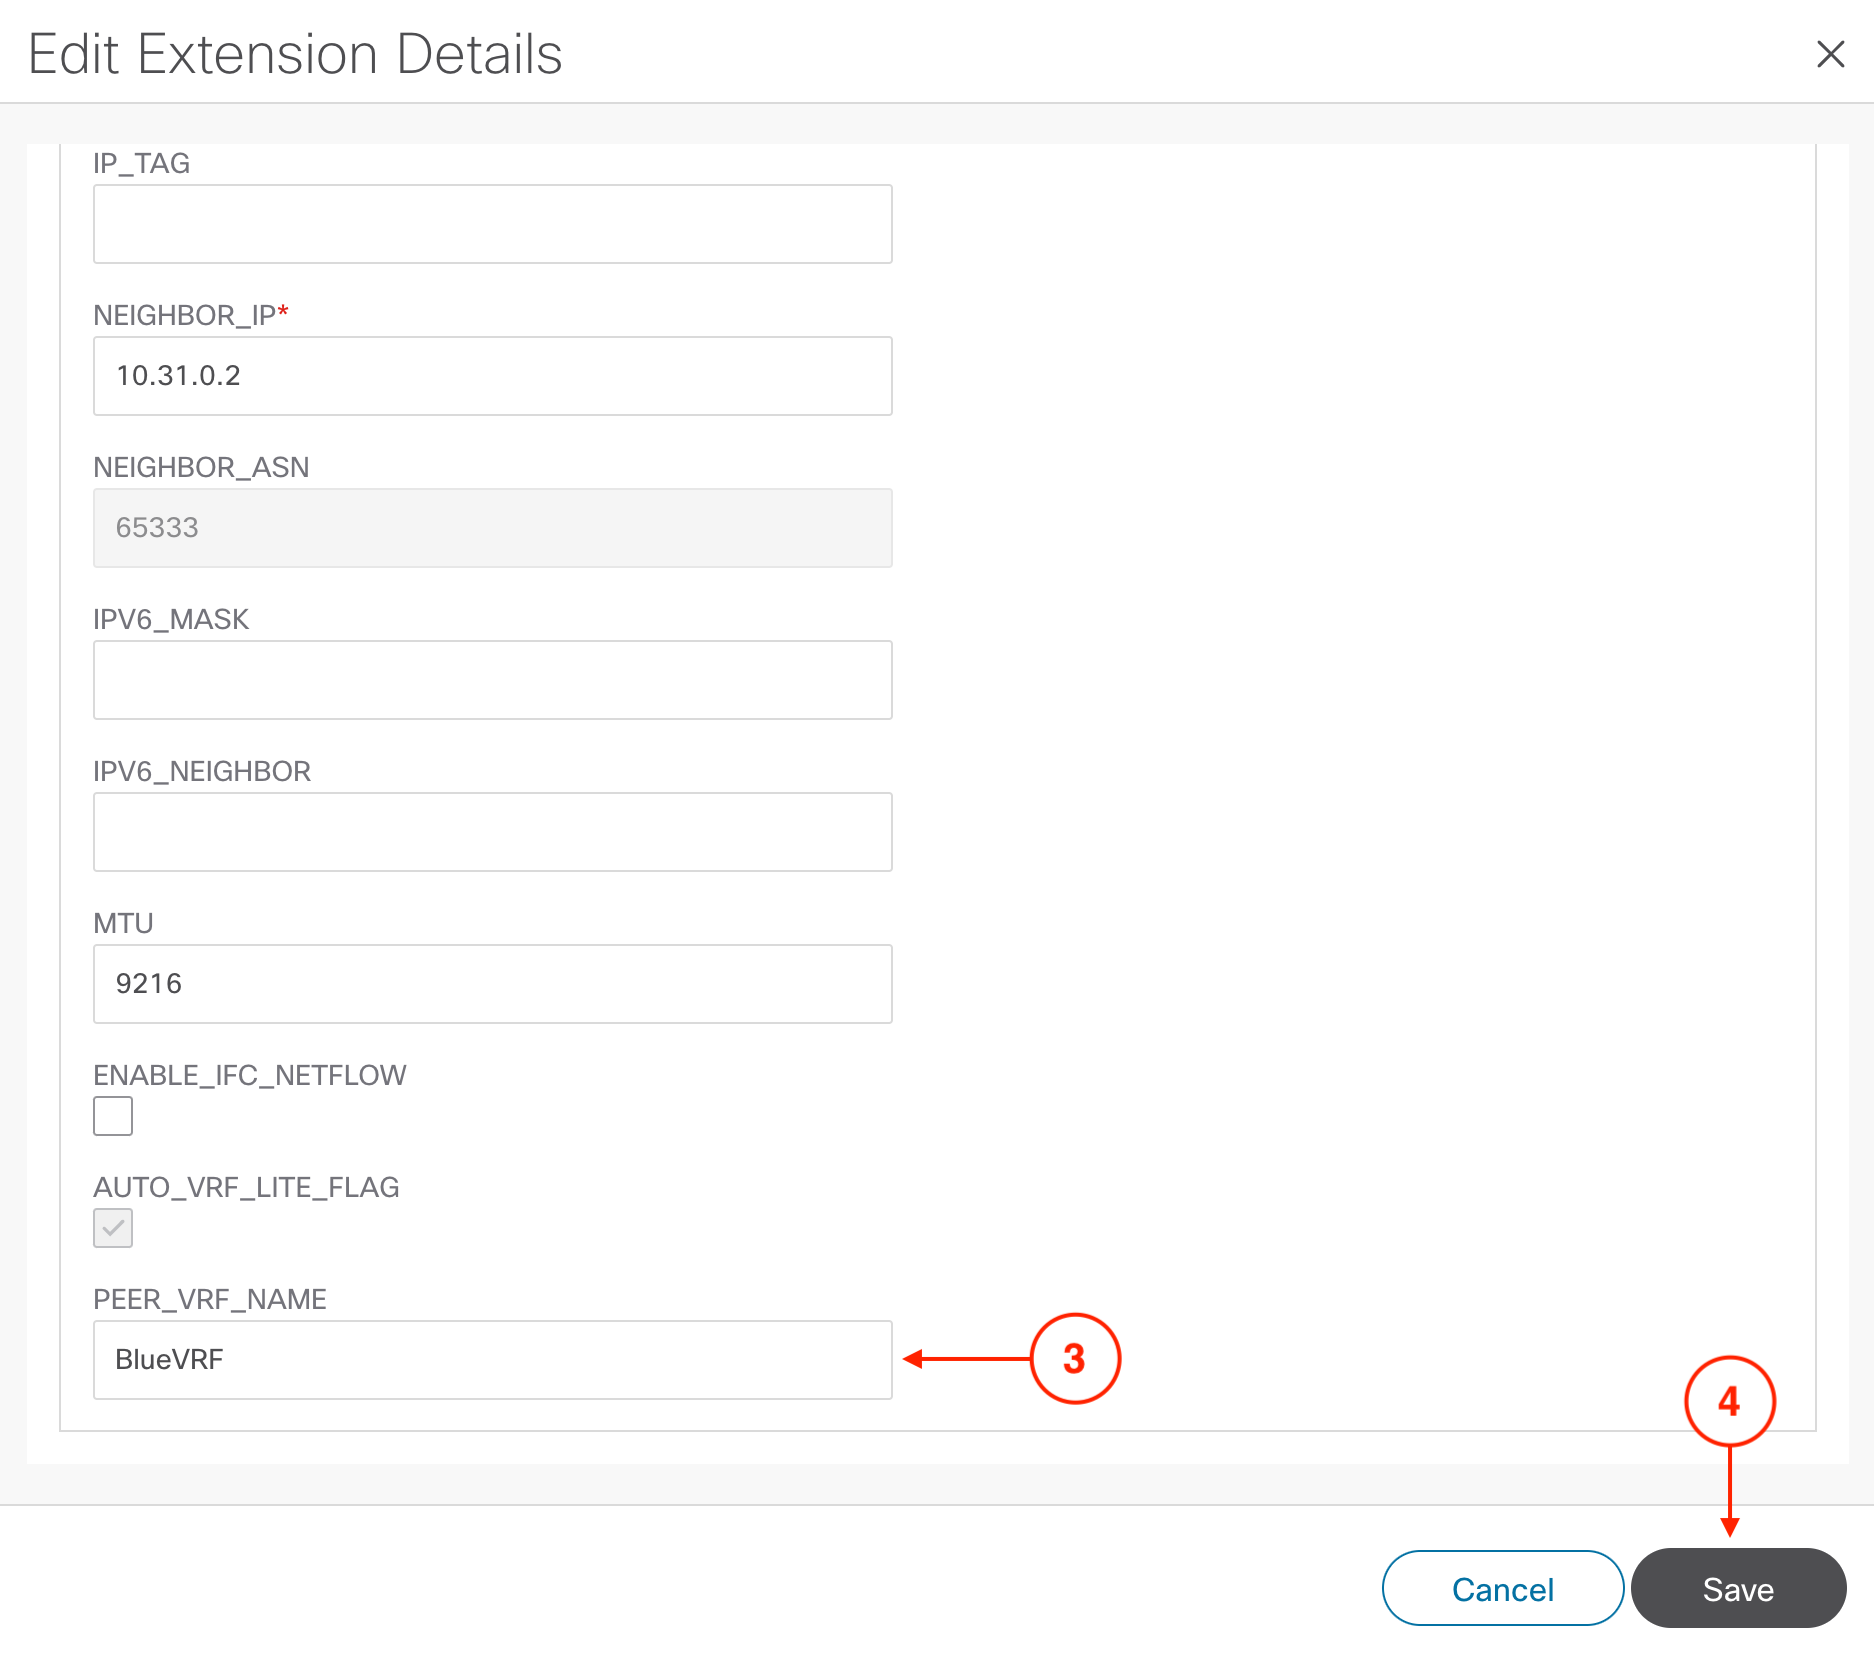
In the Extension Details popup, you can leave everything default as Nexus Dashboard is pulling the parameter values from the VRF Lite sub-interface and IP address pools in your Site1 fabric. The two key actions you need to take are to enable the extension and then to define the VRF to extend:
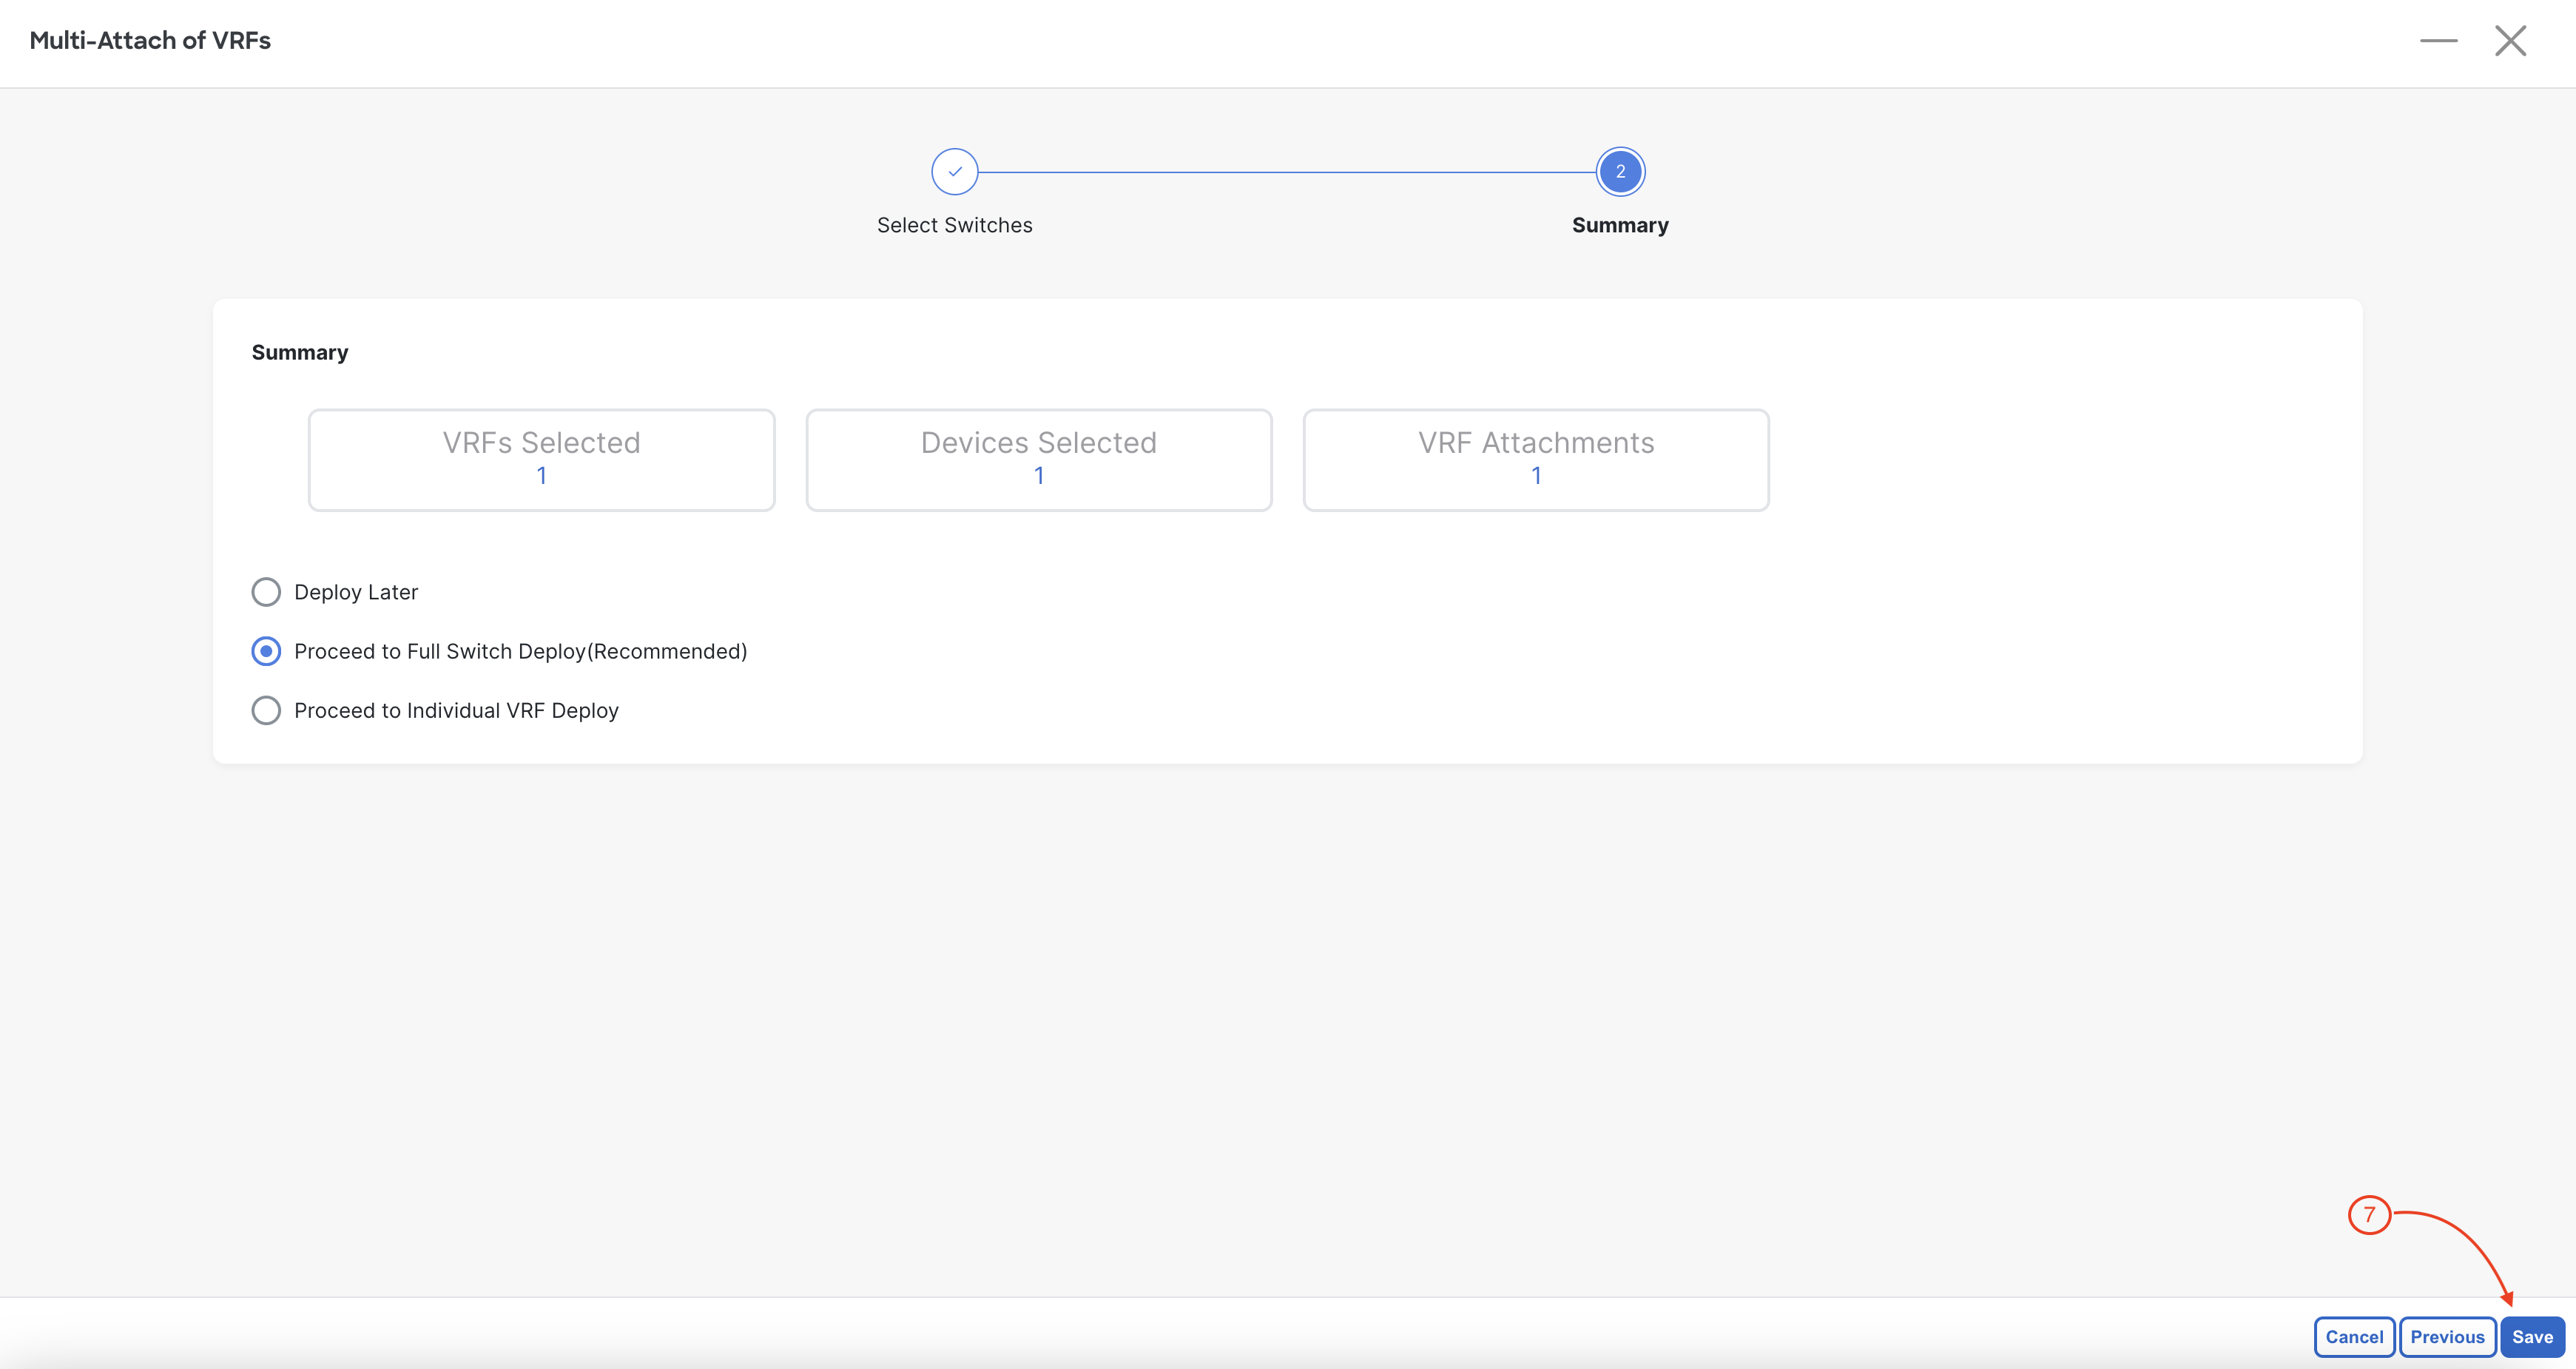
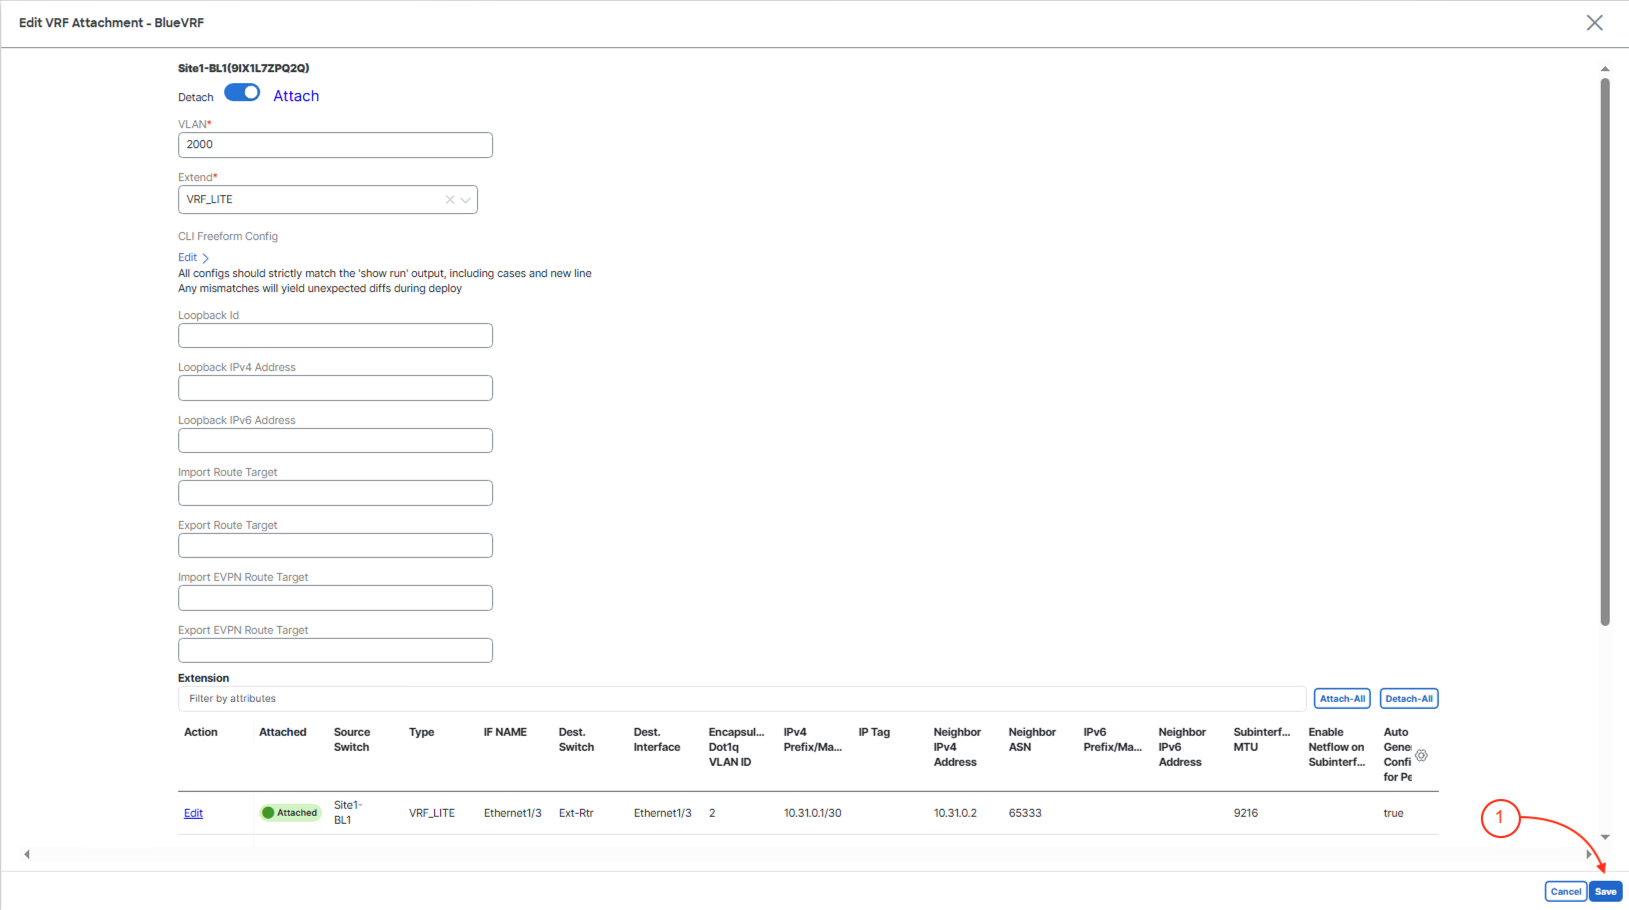
Saving the extension will redirect you back to the Edit VRF Attachment wizard. The Extension table should display the extension as green and Attached in the Attached column. If it does not, then please contact a lab instructor, otherwise, please proceed:
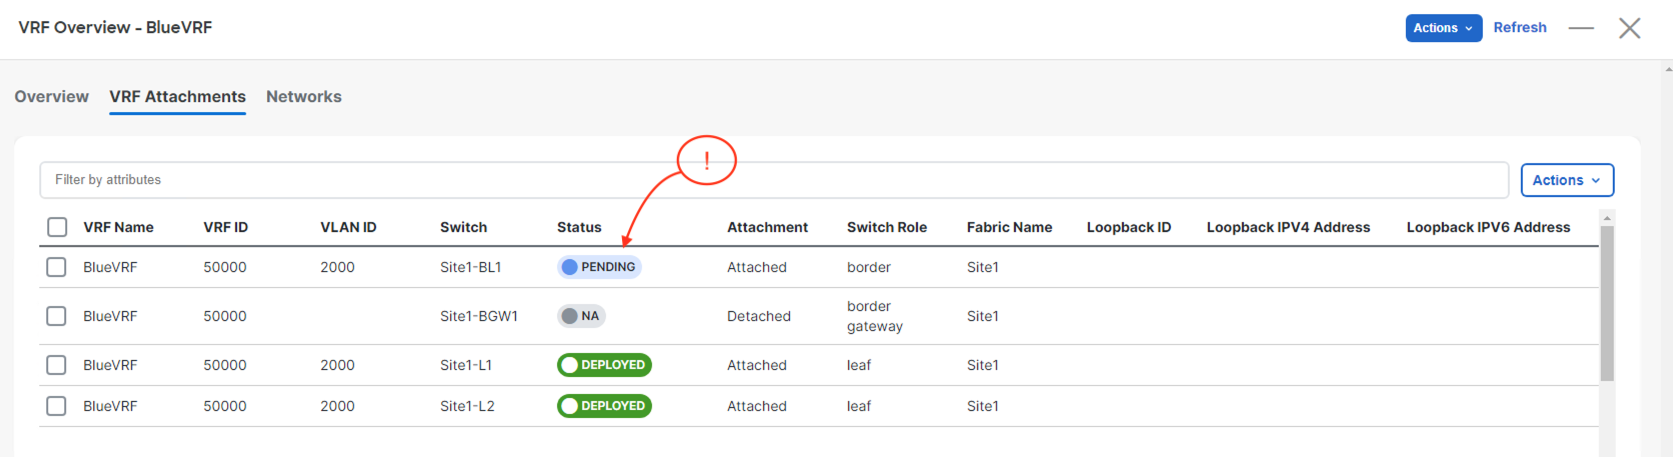
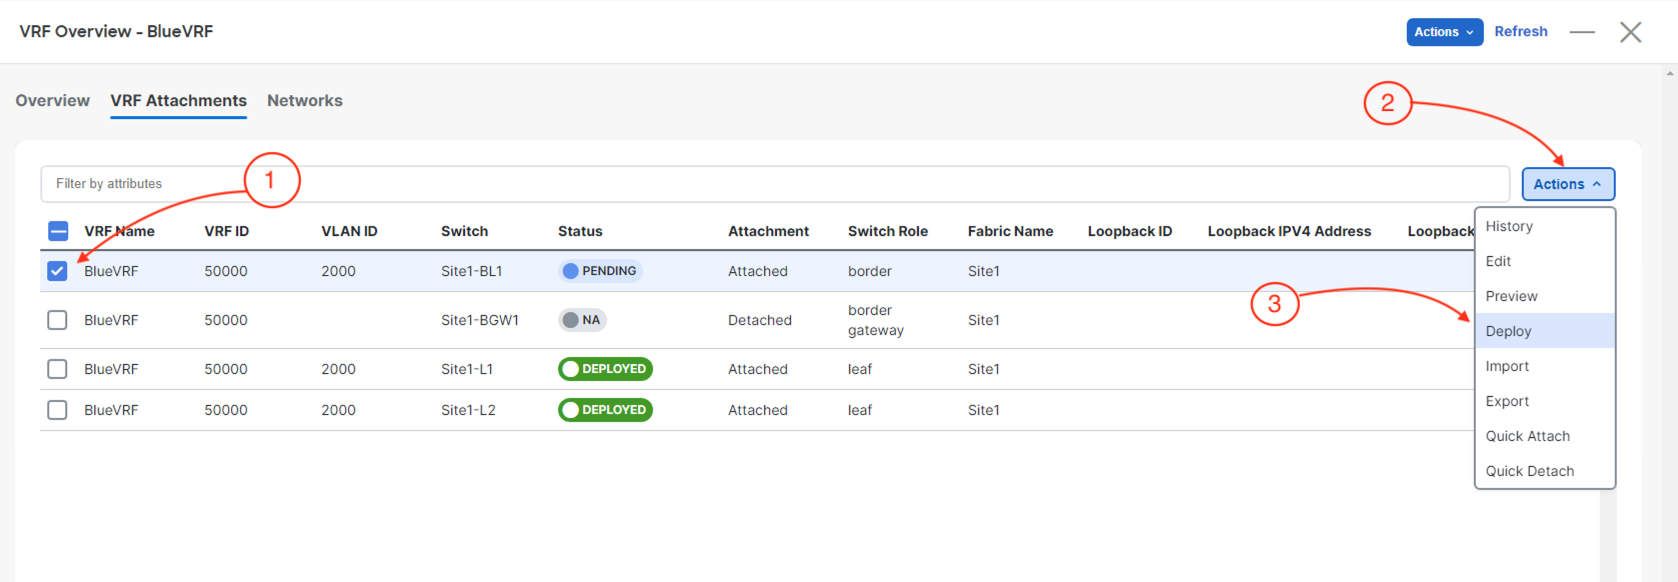
Saving the Edit VRF Attachment wizard will redirect your screen back to the VRF Attachments. Confirm your Site1-BL1 shows as PENDING:
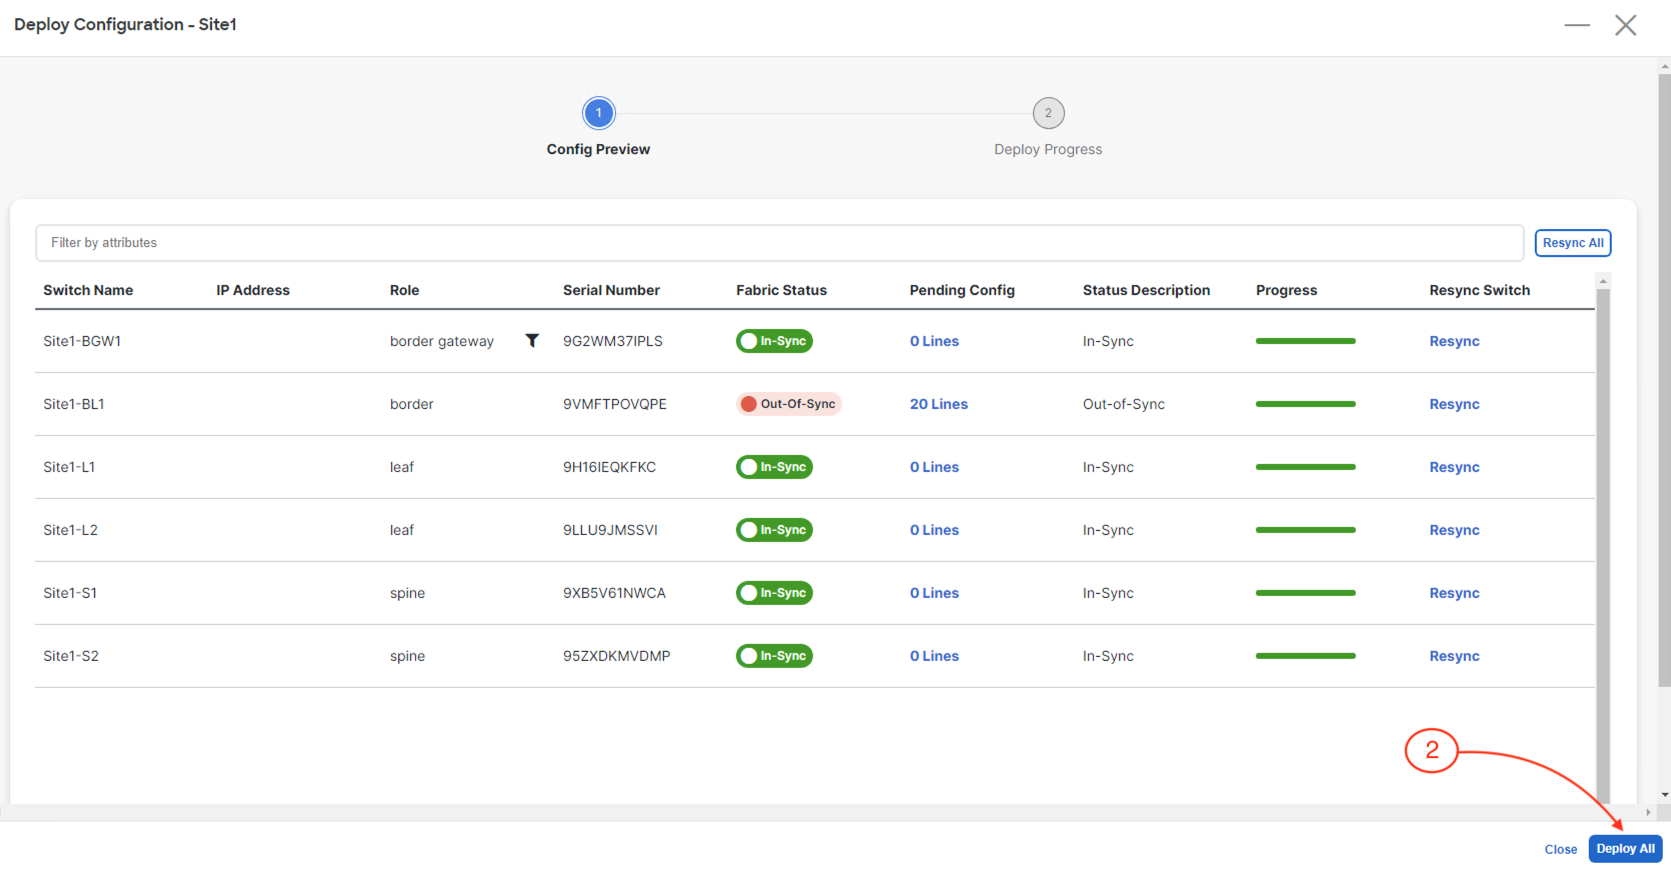
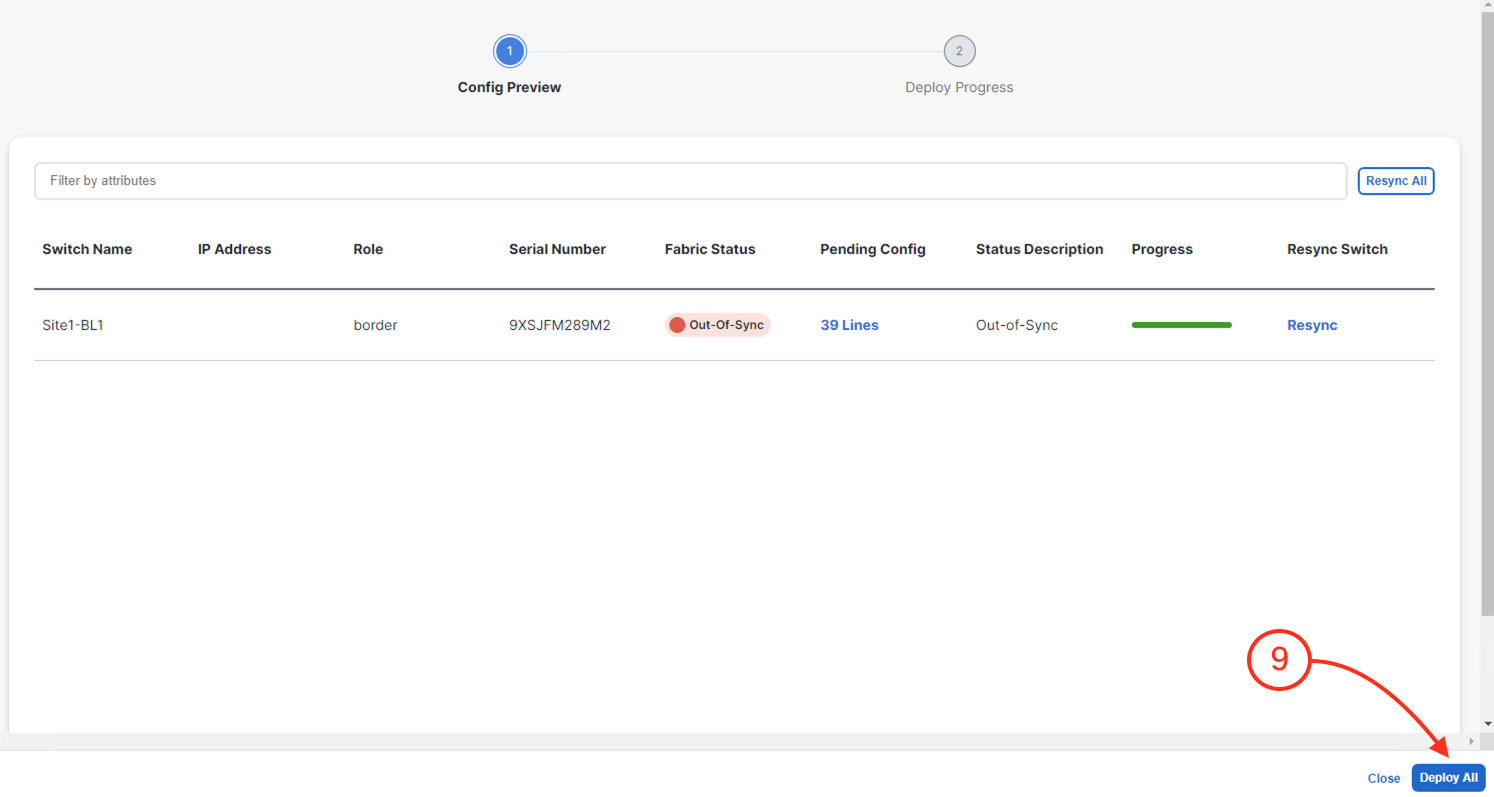
Now, launch the Deploy Configuration wizard to deploy your BlueVRF to your border leaf:
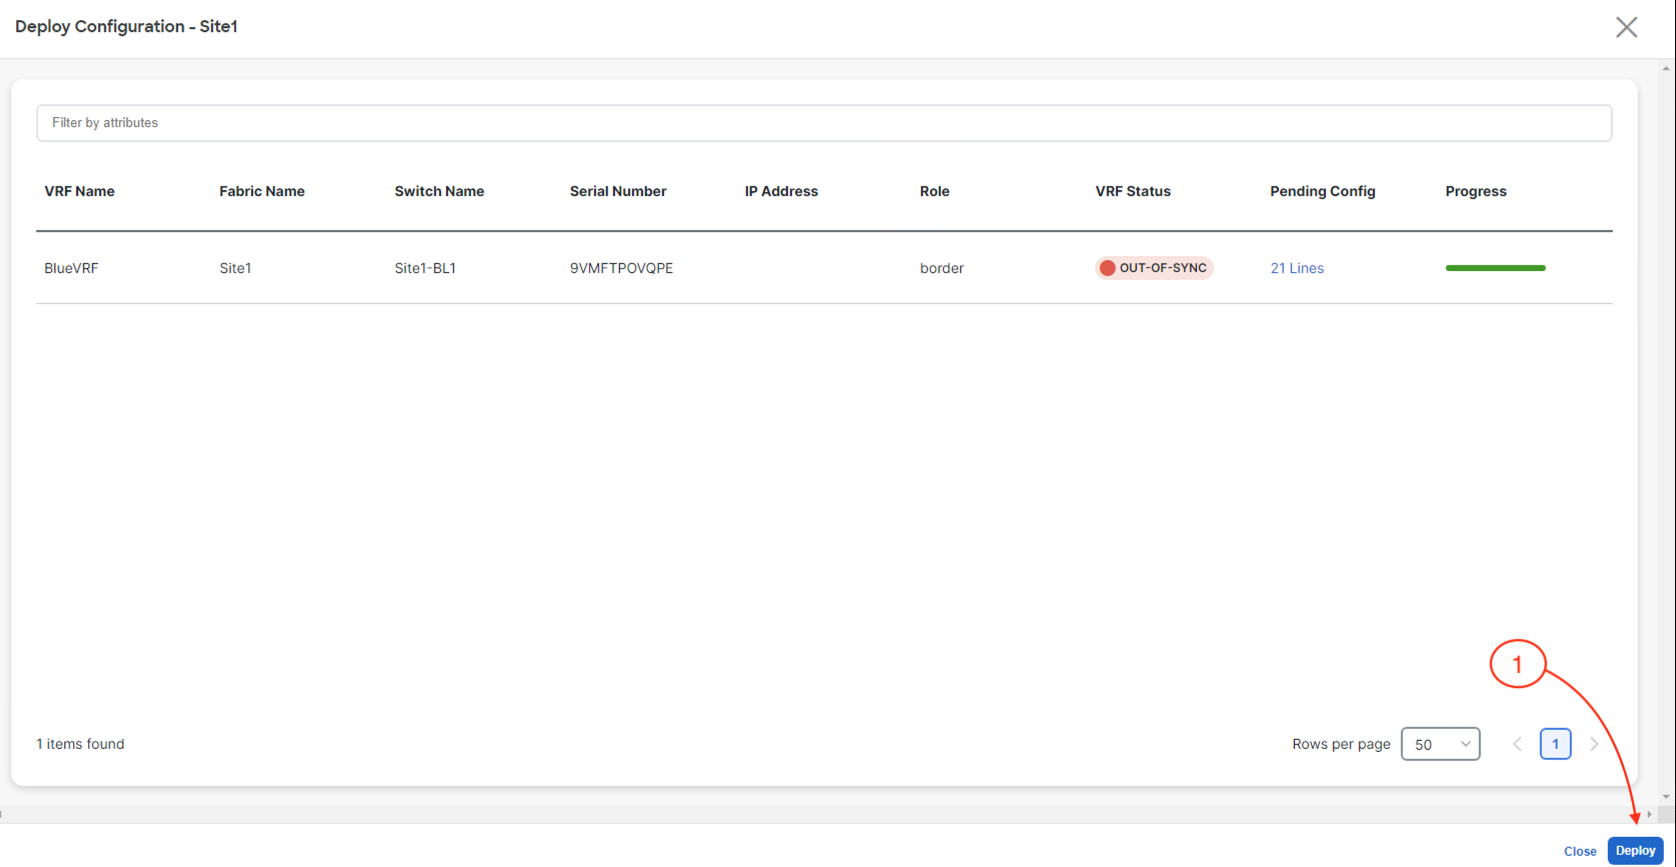
Kickoff the deployment of your BlueVRF to your border leaf by:
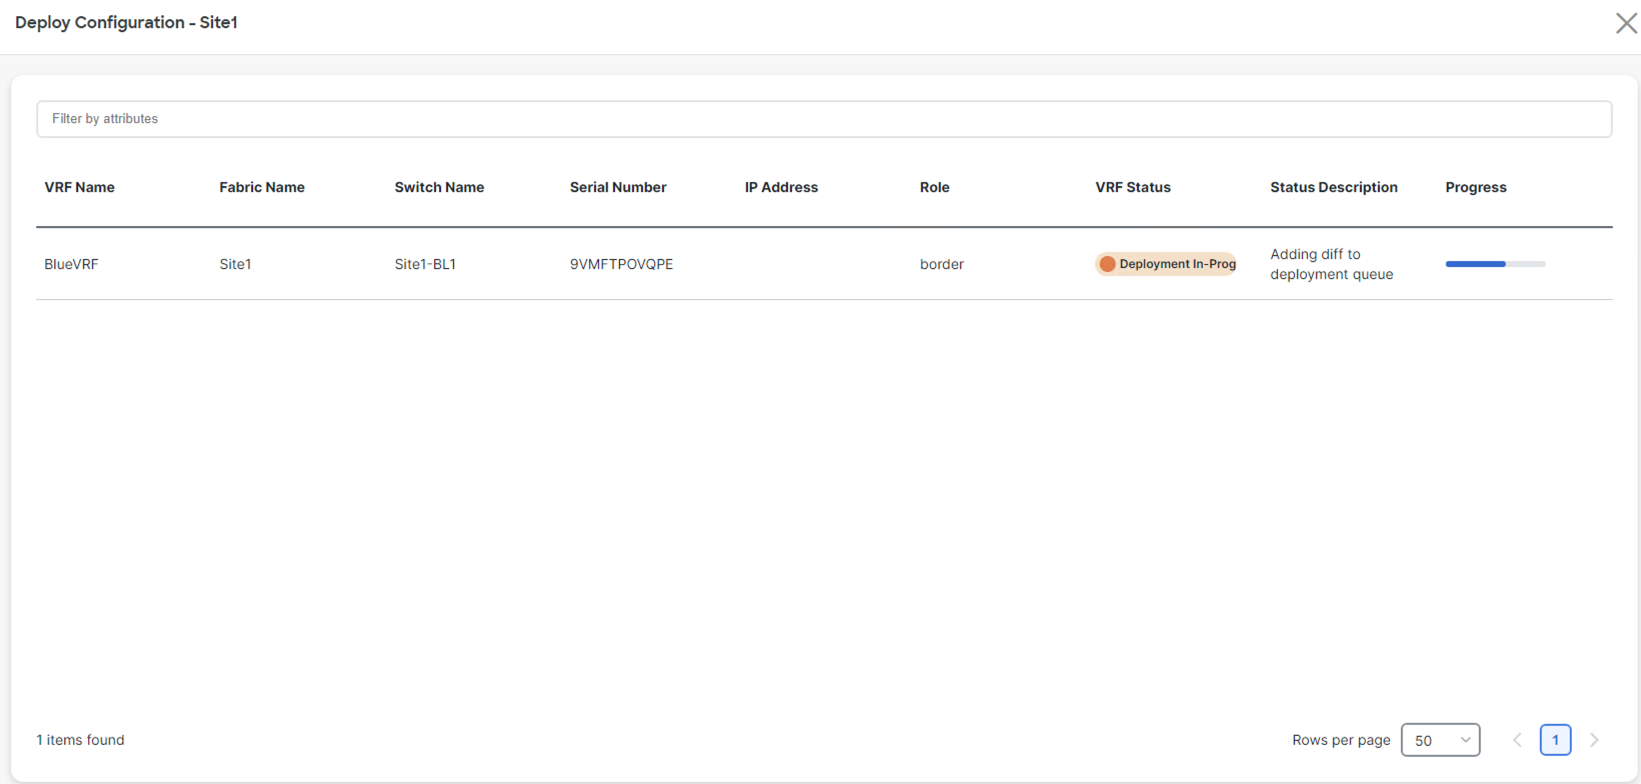
The stage moves to Deploy Progress where the Network Status will show Deployment In-Progress status along with the progress bar:
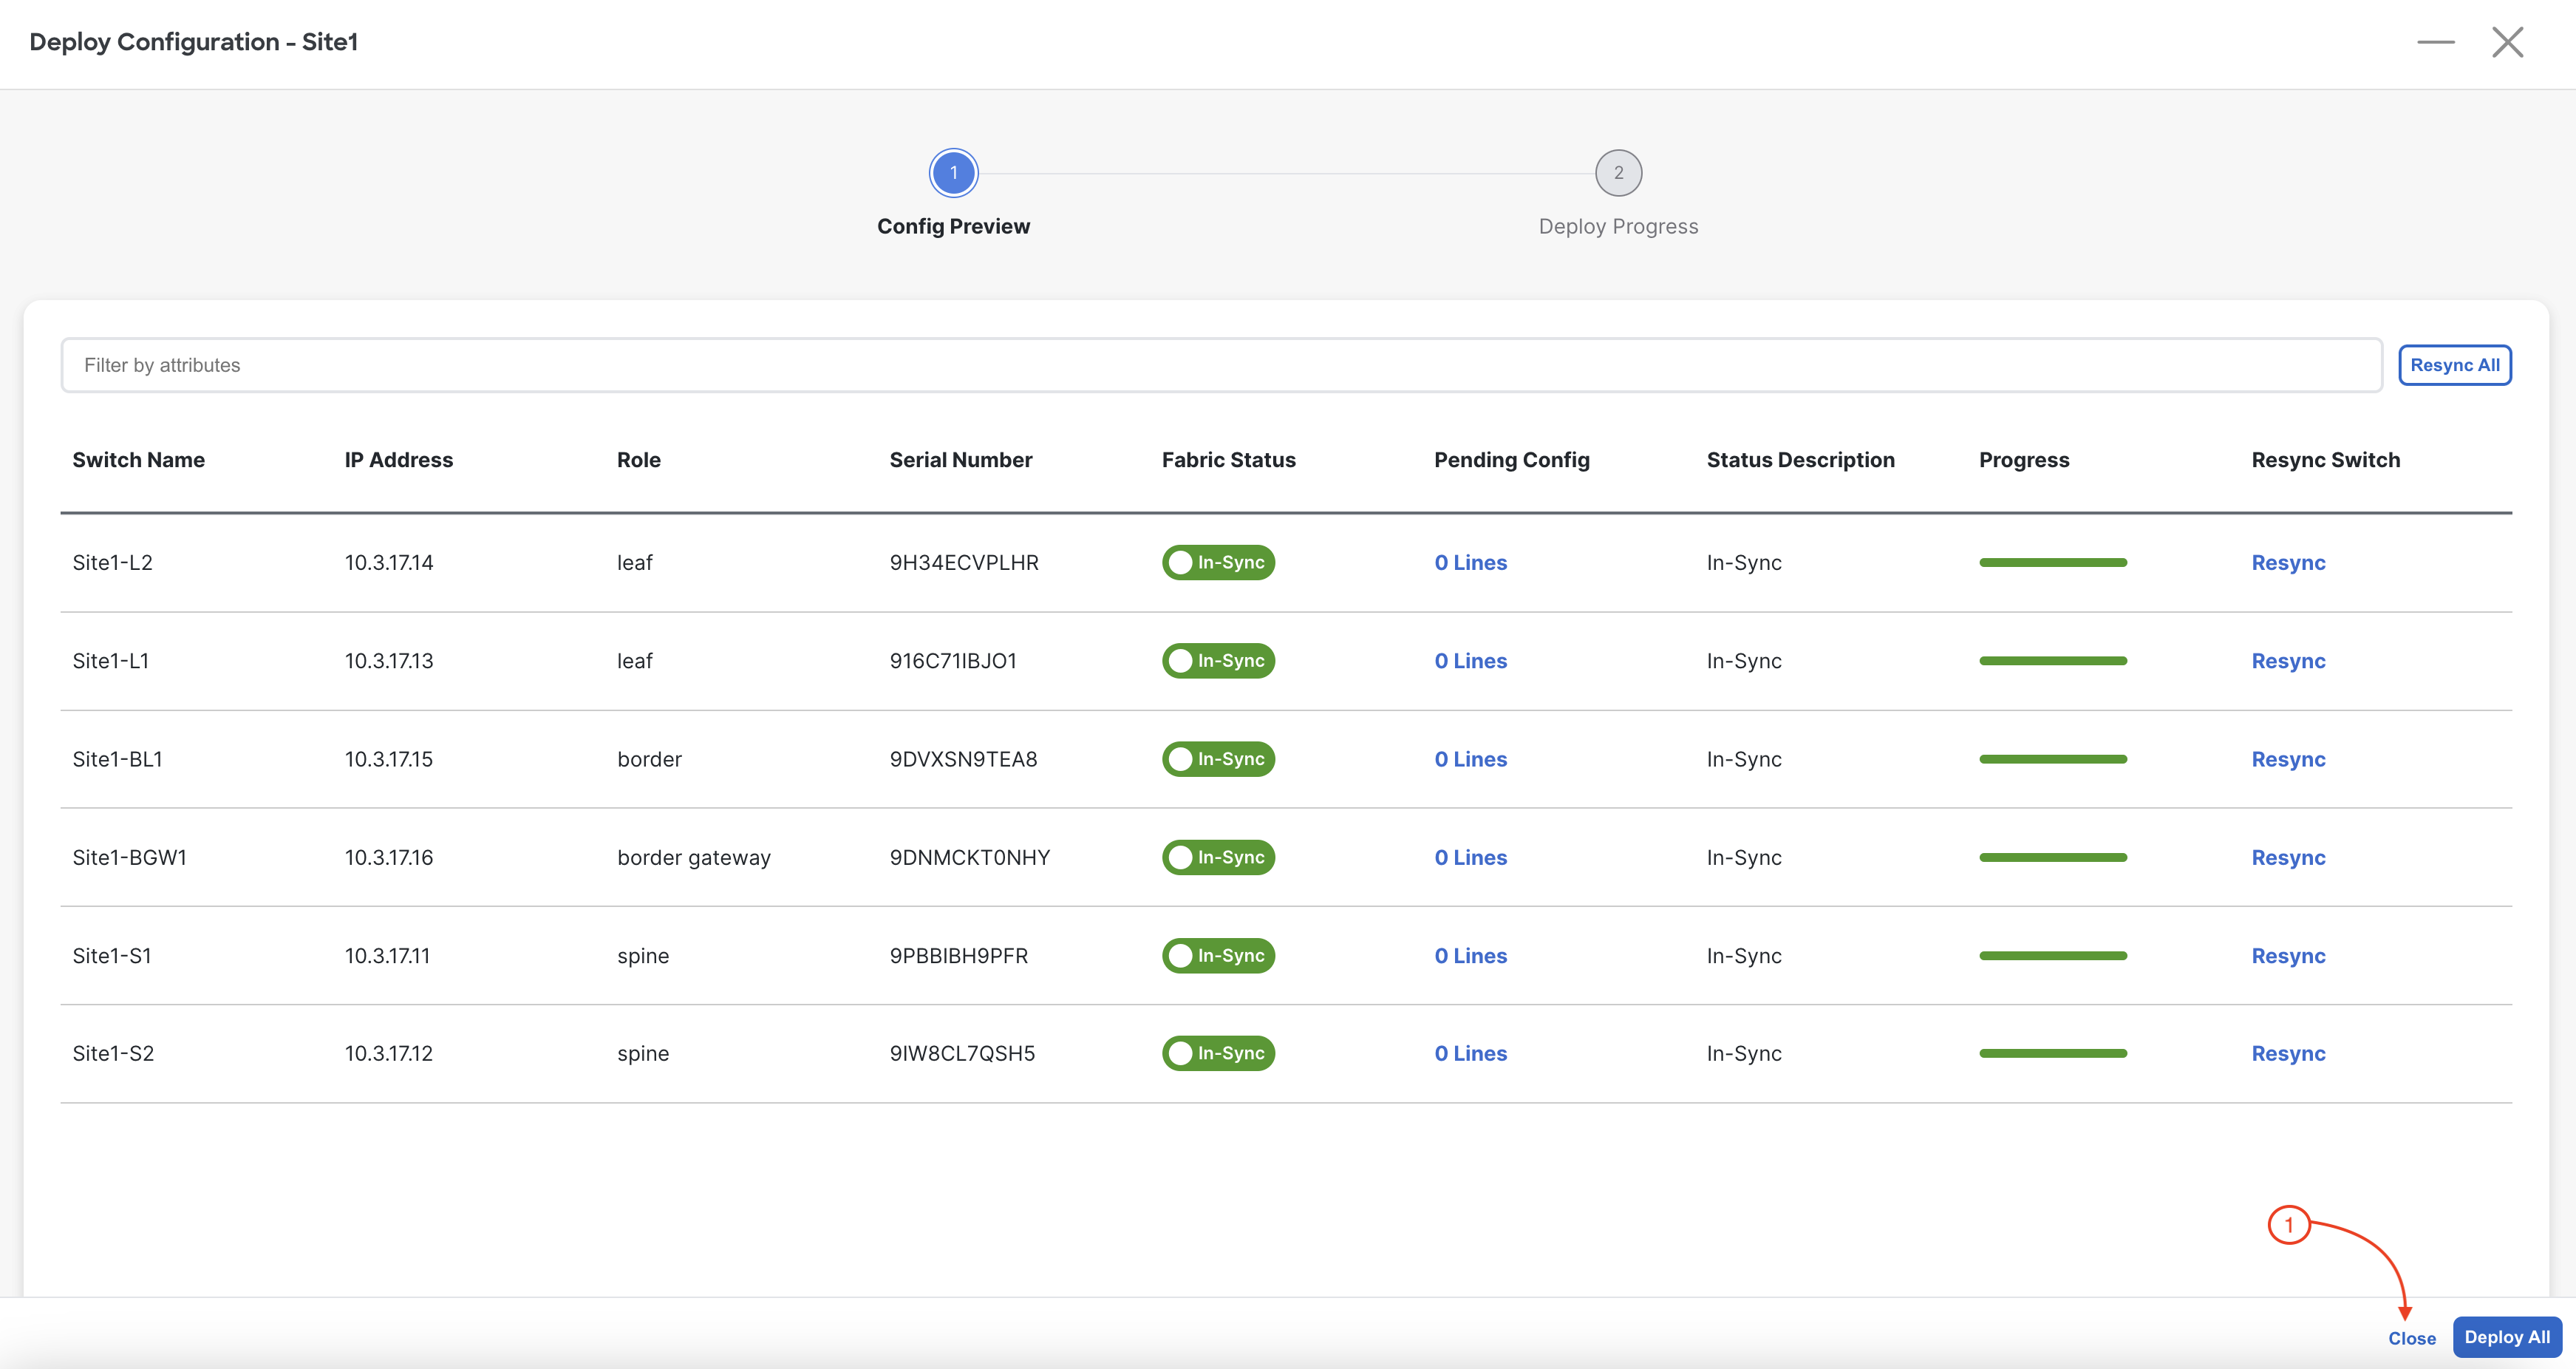
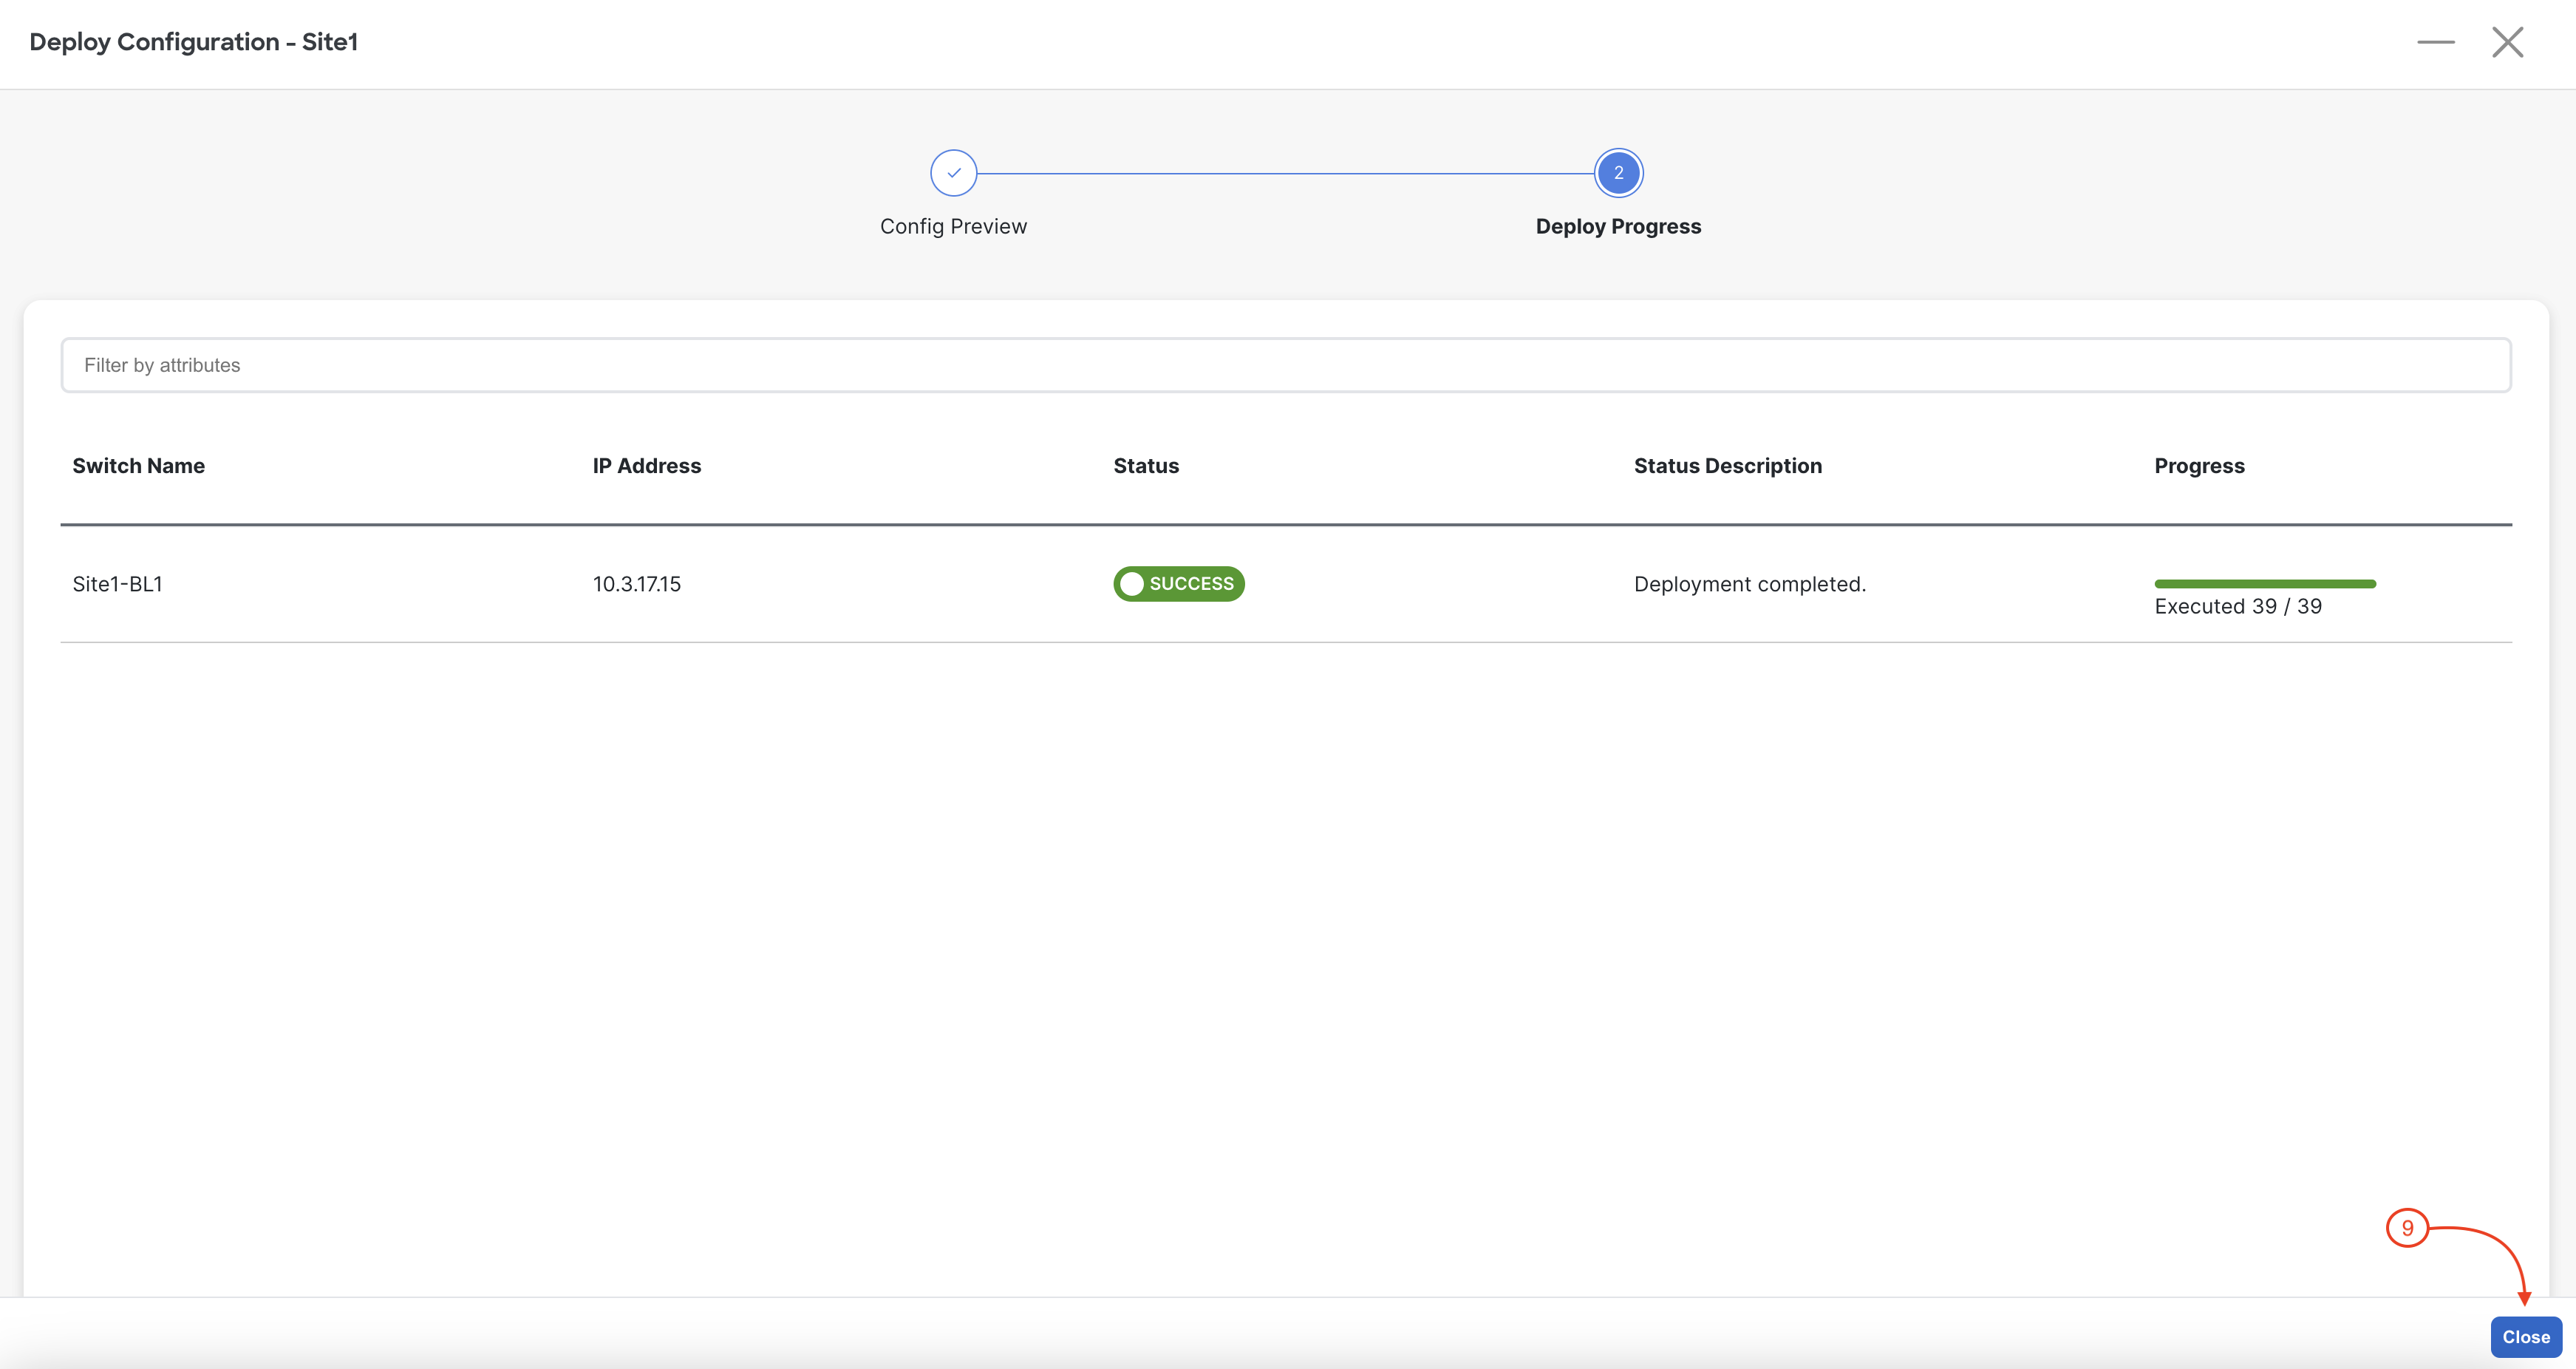
Upon a successful deployment, Nexus Dashboard's Deploy Configuration wizard should look as shown in the screenshot below; all green with SUCCESS messages and each switch's expected configuration progress bar also displaying as green and fully executed. If any error occurred, Nexus Dashboard will display a notification and the status reverted back to Out-of-Sync.

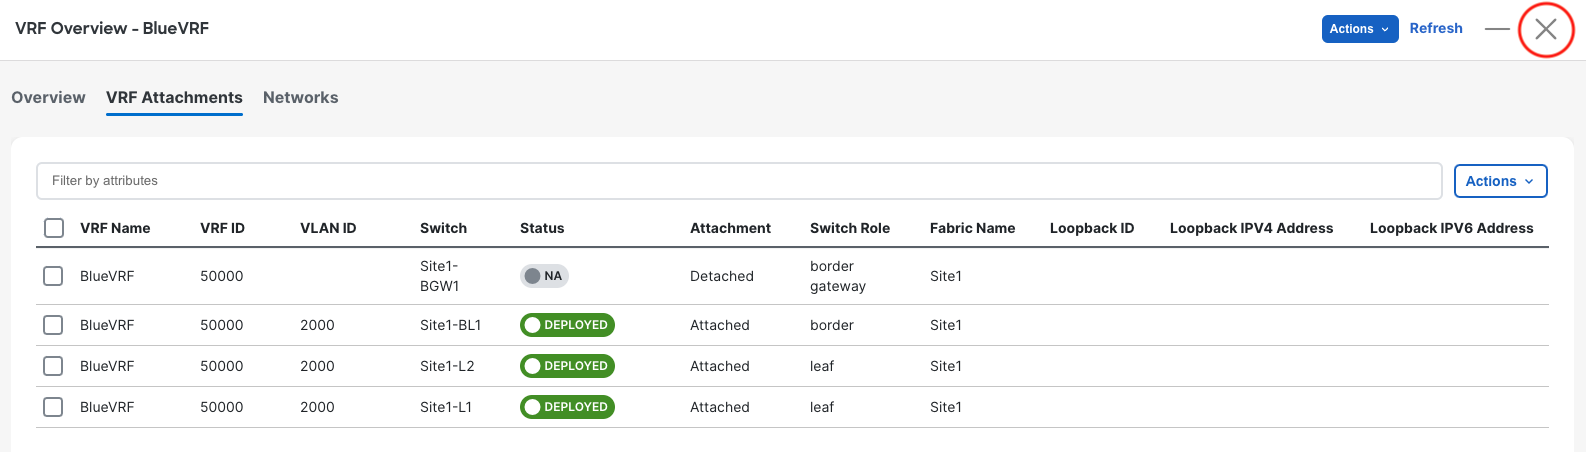
Revisit the main Overview dashboard to see that the Extended Networks/VRFs has been updated:
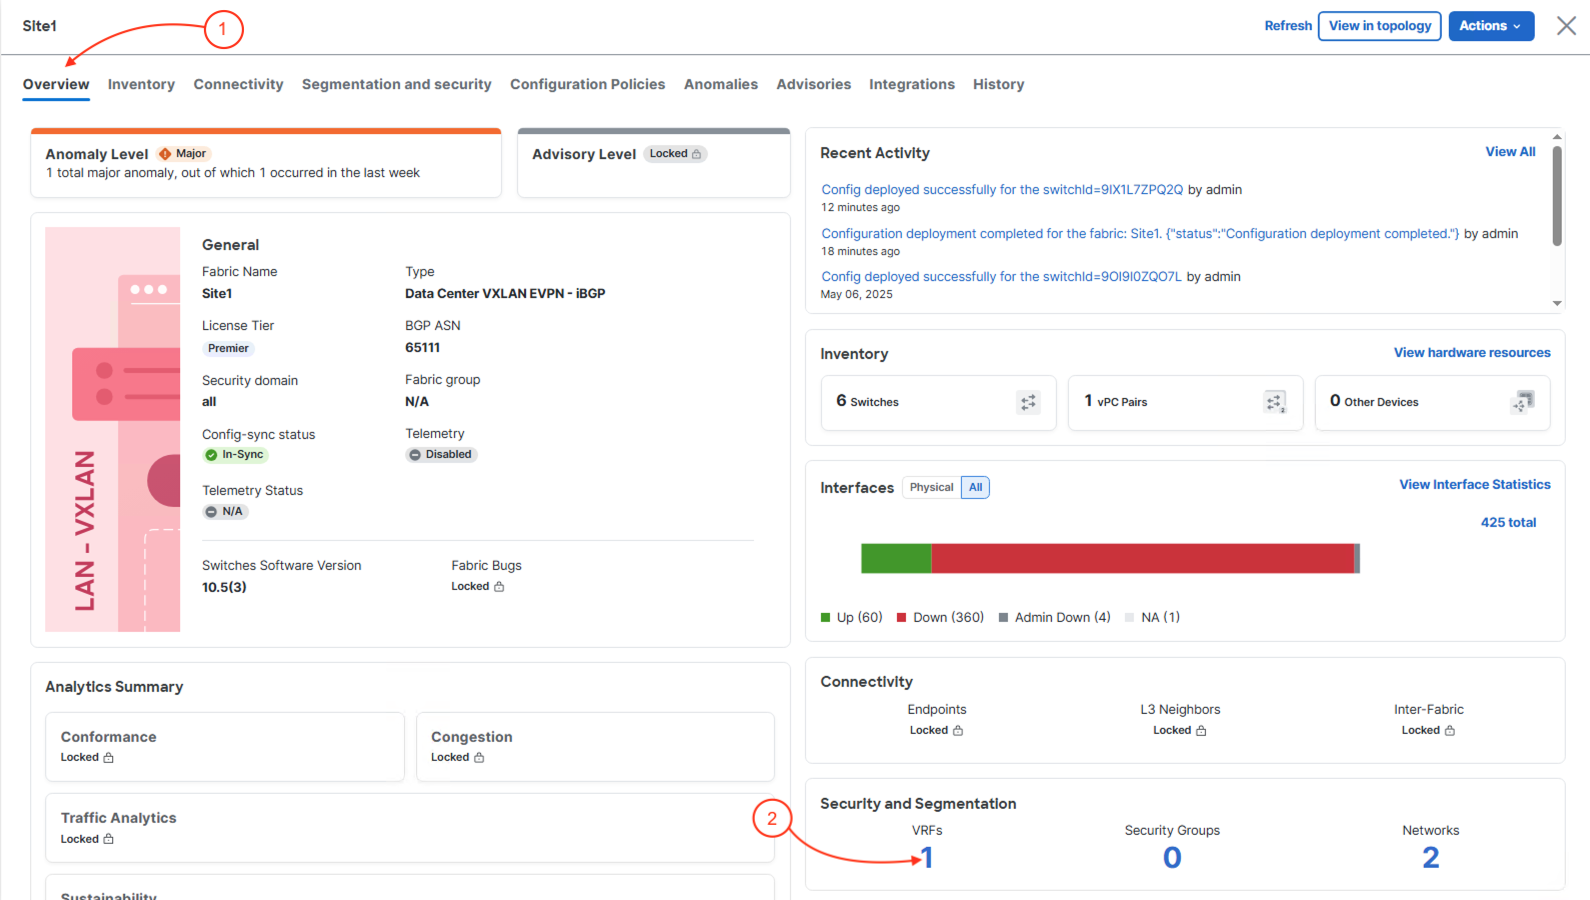
You extended BlueVRF from Site1 to the border leaf (Site1-BL1) using VRF Lite, establishing Layer 3 external connectivity. Nexus Dashboard's VRF attachment workflow automatically generated the inter-fabric link configuration, BGP peering, and SVI — connecting your VXLAN EVPN fabric to the outside world. ND handles the complex VRF Lite stitching between fabrics so you don't have to manually configure each side of the connection.
Continue to the next section to deploy the already pending configuration in your ExtL3 fabric.