Finalize external connectivity configuration across all external fabric devices.
Deploy complete external connectivity configuration to all devices in the External Fabric, ensuring end-to-end VRF Lite connectivity and proper routing between VXLAN and external networks.
Validate that all VRF extensions, BGP peerings, and routing policies are correctly configured and operational, providing reliable external connectivity for your tenants.
Navigate back to your ExtL3 fabric:
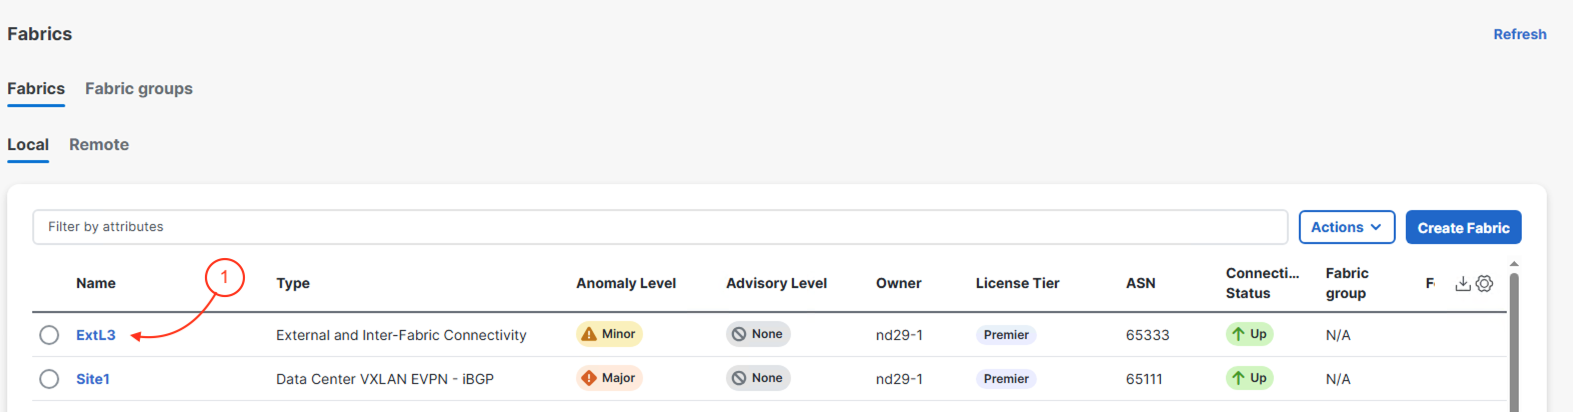
With the actions you took in your Site1 fabric, take note that your ExtL3 fabric now has Pending configuration. This is part of the automation enabled between the fabrics and switch types to enable and configure external connectivity for the VXLAN EVPN fabric when the external device is also managed by Nexus Dashboard. It now comes down to the user to trigger the deployment.
This page will provide you with specific information on your ExtRtr switch such as Management IP, Software Version, etc, but more importantly you will notice the Config Status showing as Pending. Now, we will Deploy the configuration to the device.
The configuration deployment to your external device is relatively small and includes the sub-interface configuration mentioned before:
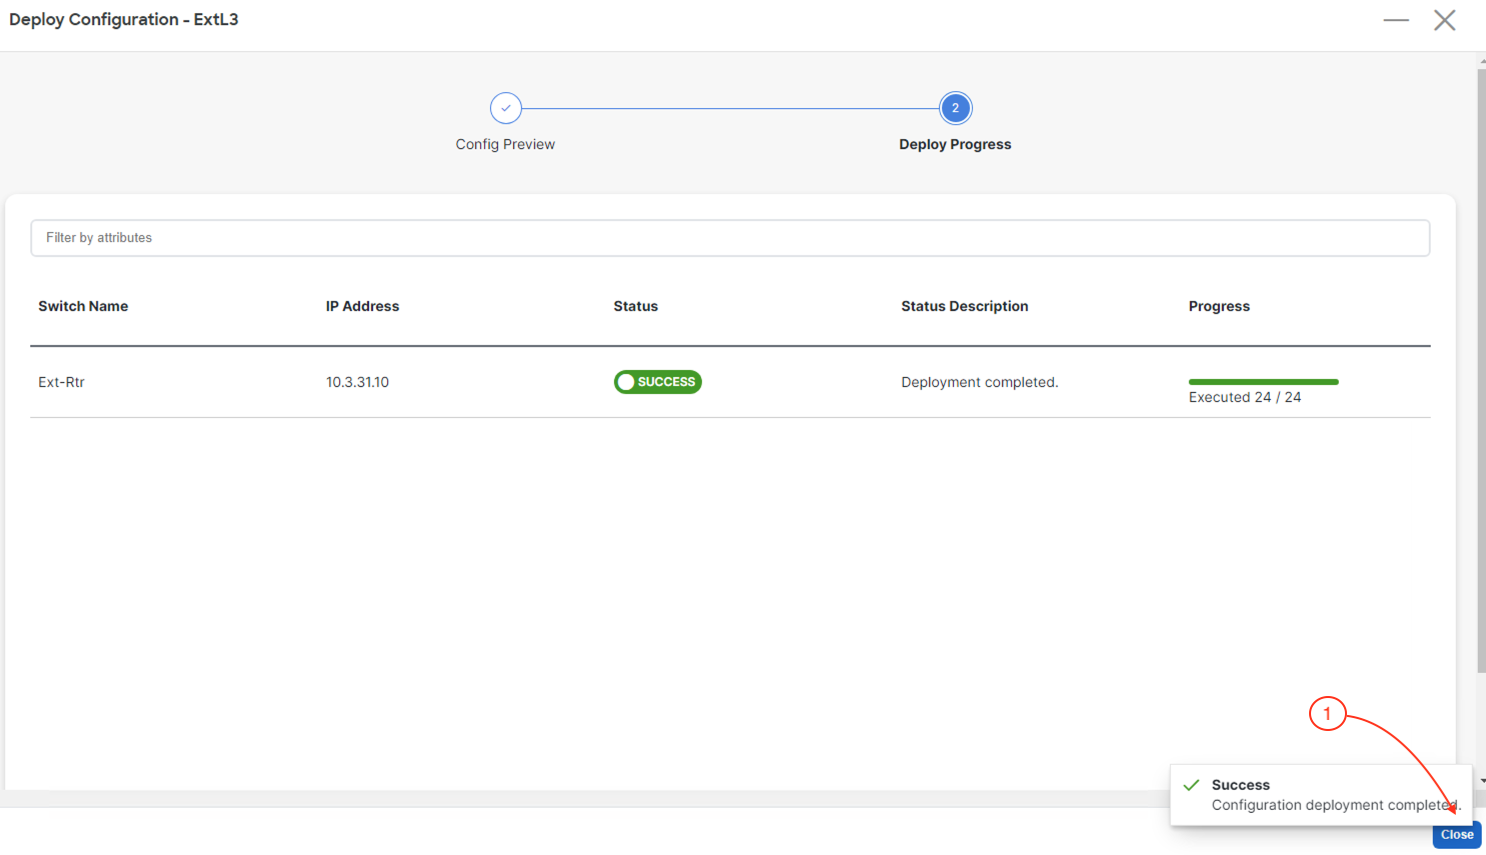
Upon a successful deployment, Nexus Dashboard's Deploy Configuration wizard should look as shown in the screenshot below; all green with SUCCESS messages and each switch's expected configuration progress bar also displaying as green and fully executed. If any error occurred, Nexus Dashboard will display a notification and the status reverted back to Out-of-Sync.
Back at the main Switches overview, your Ext-Rtr should display a Config Status of In-Sync. You may need to hit the Refresh button, if the Config Status has not been updated.