Apply interface templates across multiple switches from a centralized GUI—no SSH or manual CLI required.
Nexus Dashboard lets you create and modify interface configurations using template policies, just like using the command line but from a centralized interface.
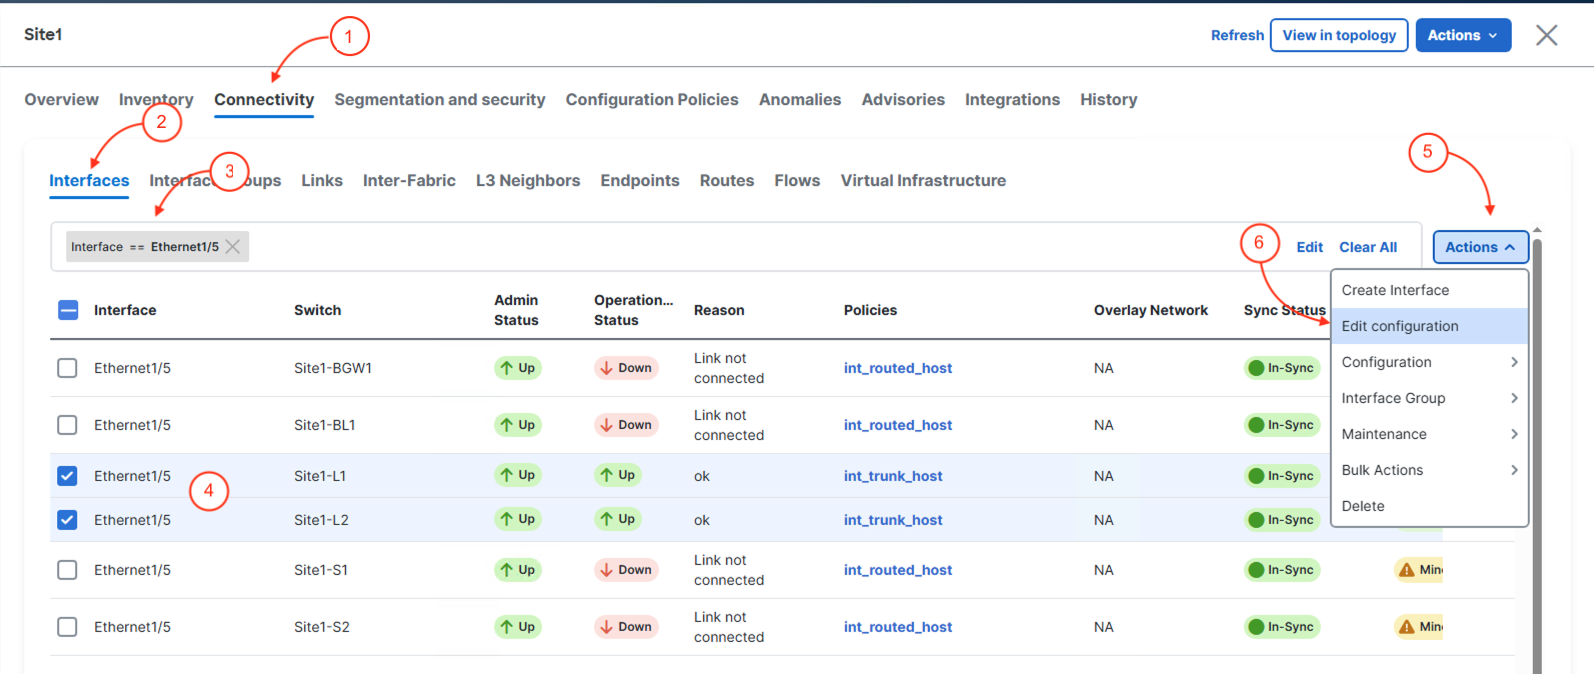
Use the filter field by typing Interface, then ==, and the interface name (e.g., Ethernet1/5) with word completion to quickly locate interfaces.
From the Overview dashboard, you need to navigate to Interfaces to view all the interfaces Nexus Dashboard is aware of from your switches and begin your next task.
Now we need to the same thing on the Site1-L2 switch.
Now we need to save and deploy the configuration.
Back at the main Interfaces overview, the filter for Ethernet1/5 should still be active. Locate the Ethernet1/5 interfaces for Site1-L1 and Site1-L2 and ensure the Policies column shows int_access_host