Create Loopback
Nexus Dashboard

Create Loopback Interfaces

Configure loopback interfaces for BGP peering and external routing stability.

BGP Peering Interfaces

Create loopback interfaces on external devices to provide stable, always-up IP addresses for BGP peering, ensuring reliable routing even if physical interfaces experience issues.

Routing Best Practices

Using loopback interfaces for BGP peering follows Cisco best practices, providing consistent router IDs and resilient control plane connectivity for external routing protocols.

Step 1 - Navigate to Interfaces & Launch Create Interface Wizard

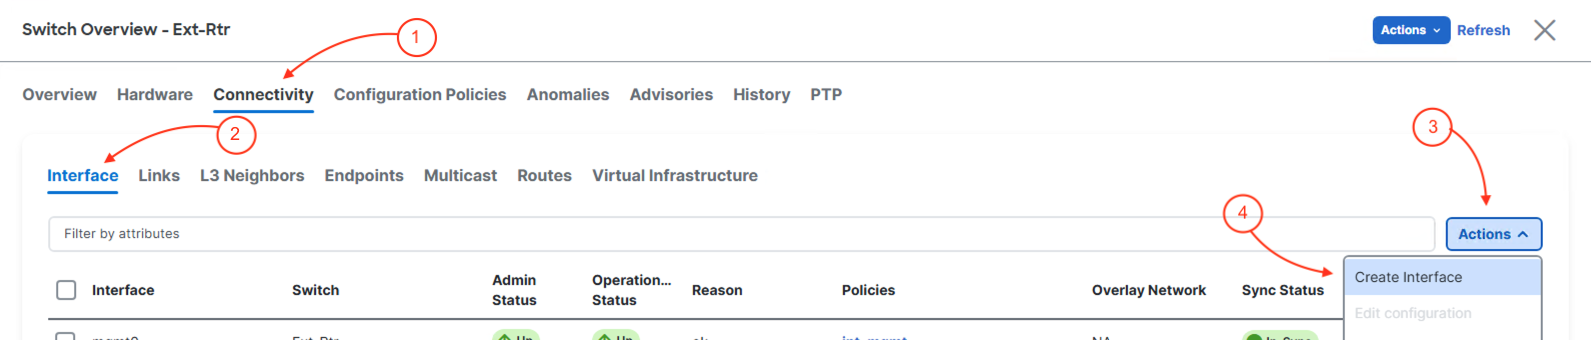
Navigate to Interfaces to launch the Create Interface wizard:

  1. Click Connectivity in the top navigation bar
  2. Click Interfaces
  3. Click Actions
  4. Click Create Interface

Step 2 - Create a Loopback Interface

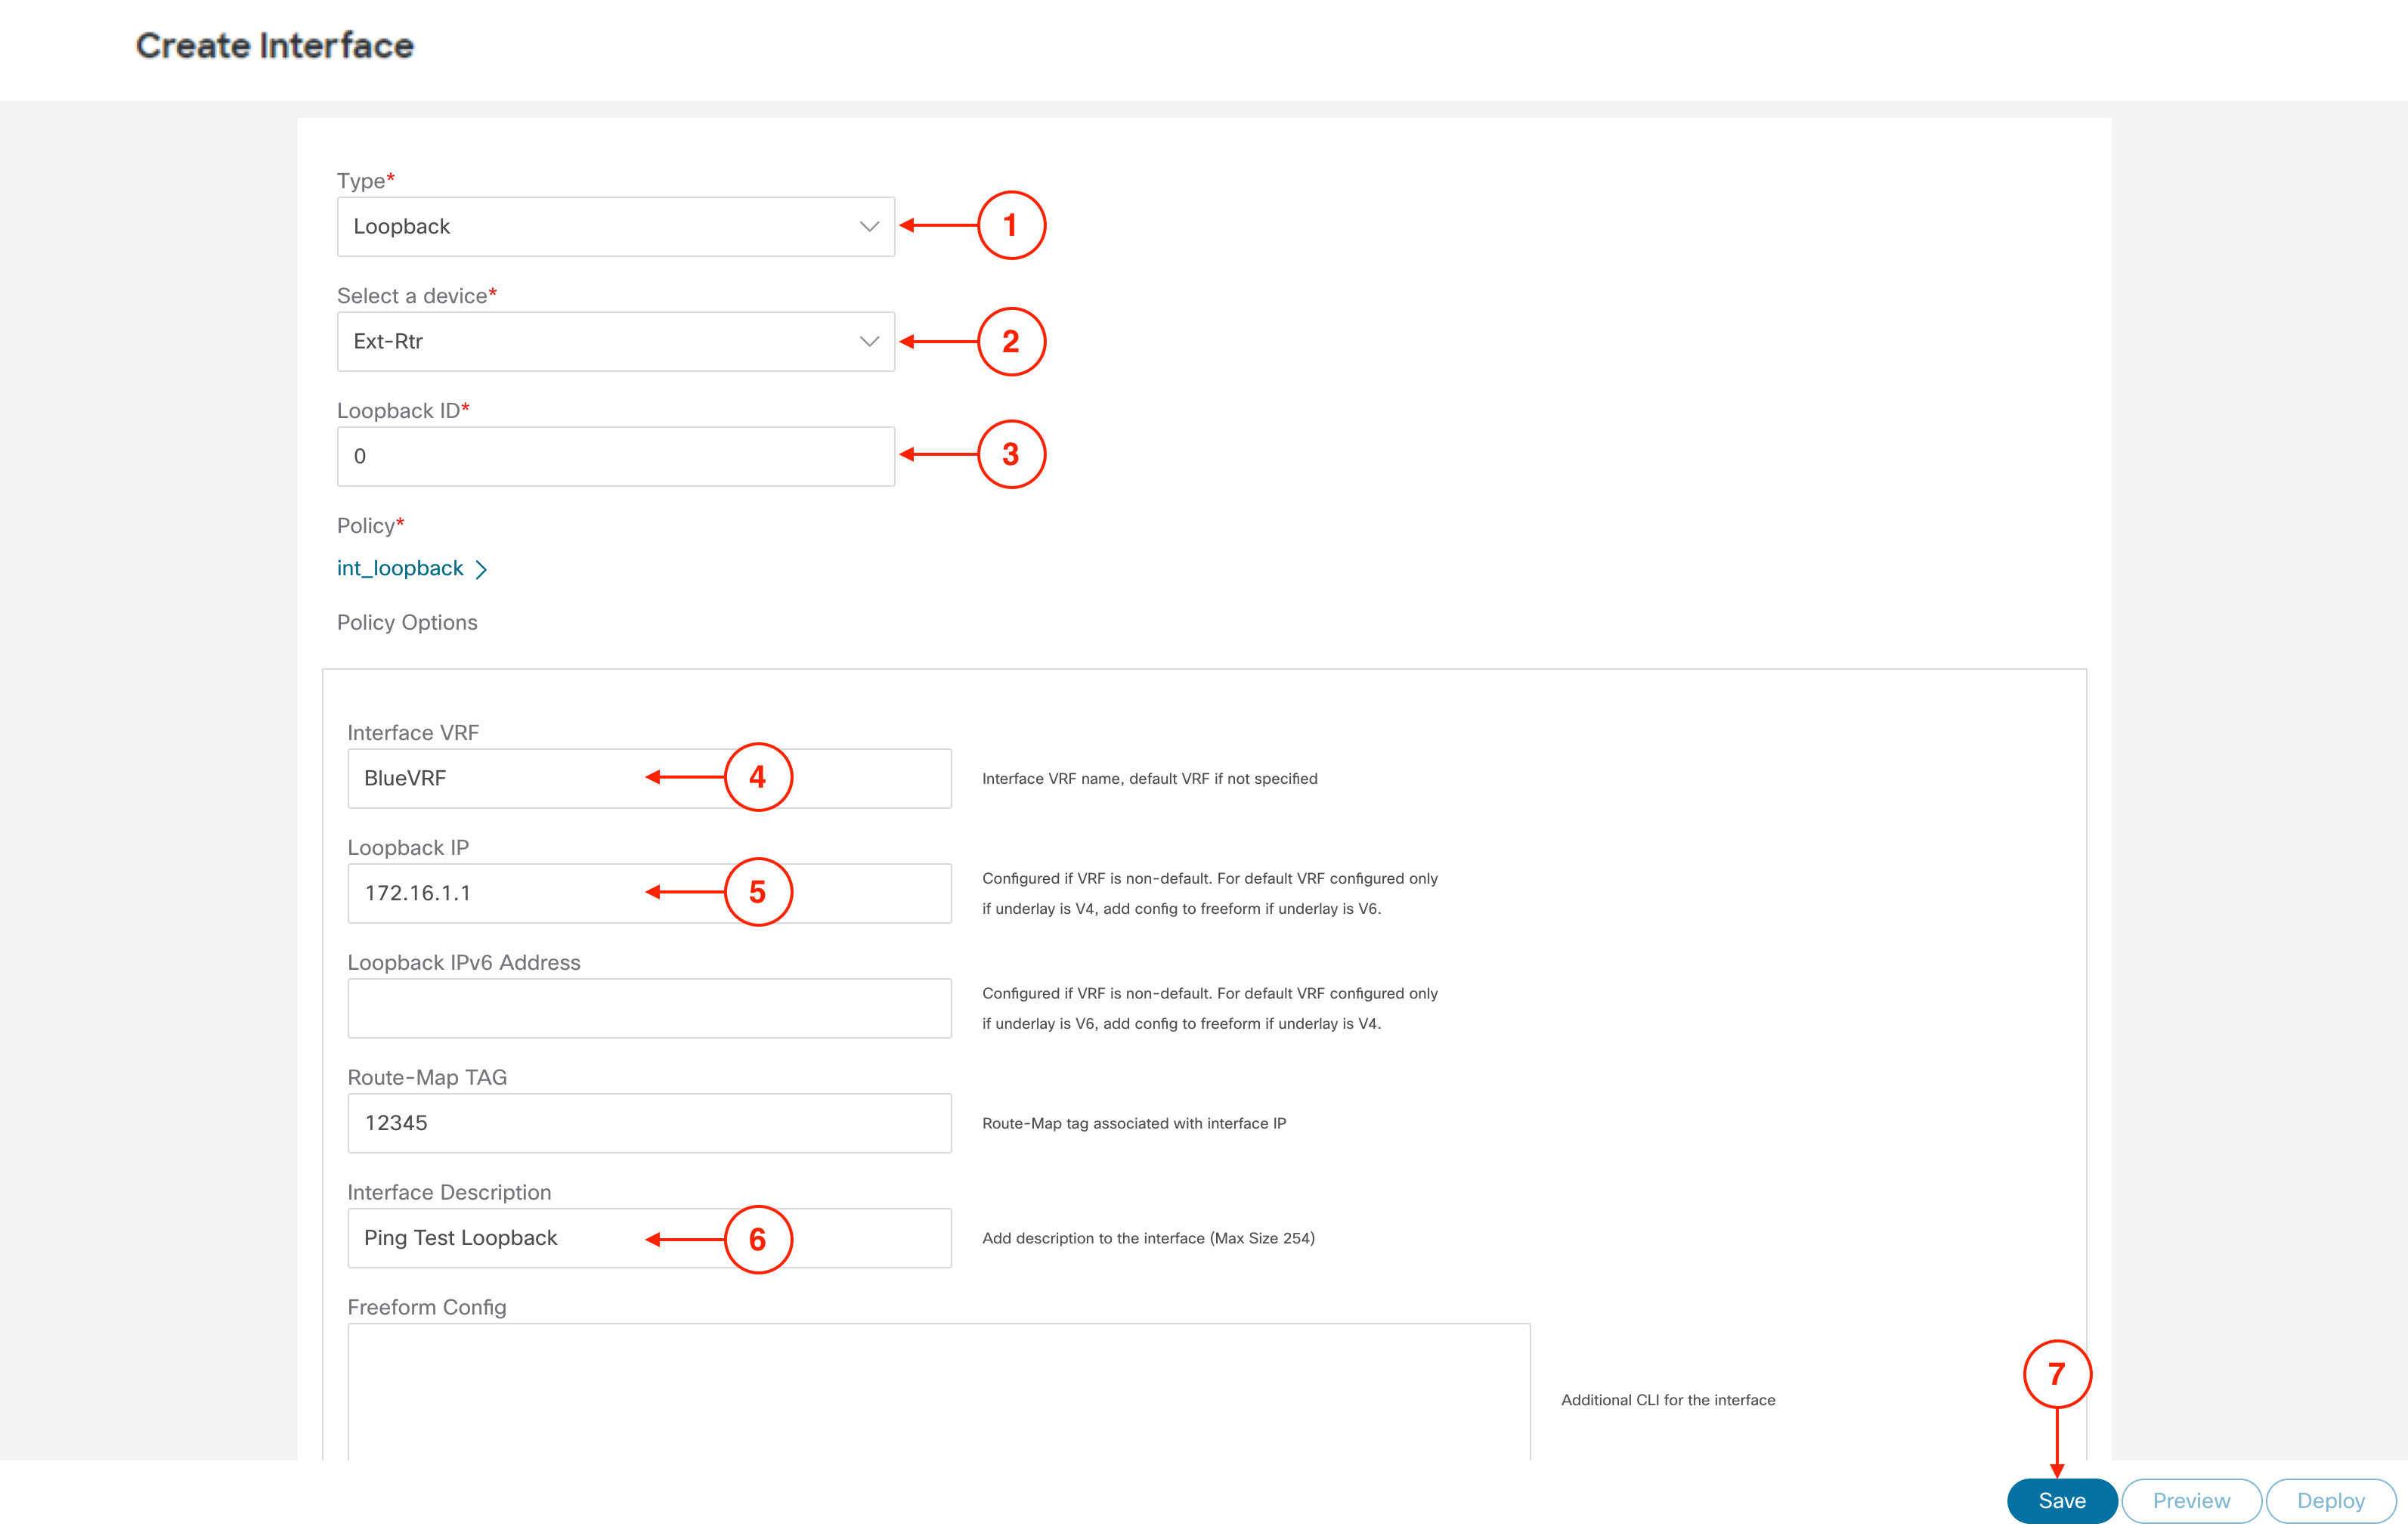
In the Create Interface wizard,

  1. In the Type dropdown, click Loopback
  2. In the Select a device dropdown menu, select Ext-Rtr
  3. Set the Loopback ID to 0
  4. Set the Interface VRF to BlueVRF
  5. Set the Loopback IP to 172.16.1.1
  6. Set the Interface Description to Ping Test Loopback
  7. Click Save
  8. Click Deploy
  9. Click Deploy Config

Step 3 - Close Create Interface Wizard

  1. In the top right corner, click the to close the Create Interface wizard

Step 4 - Review Loopback is Created

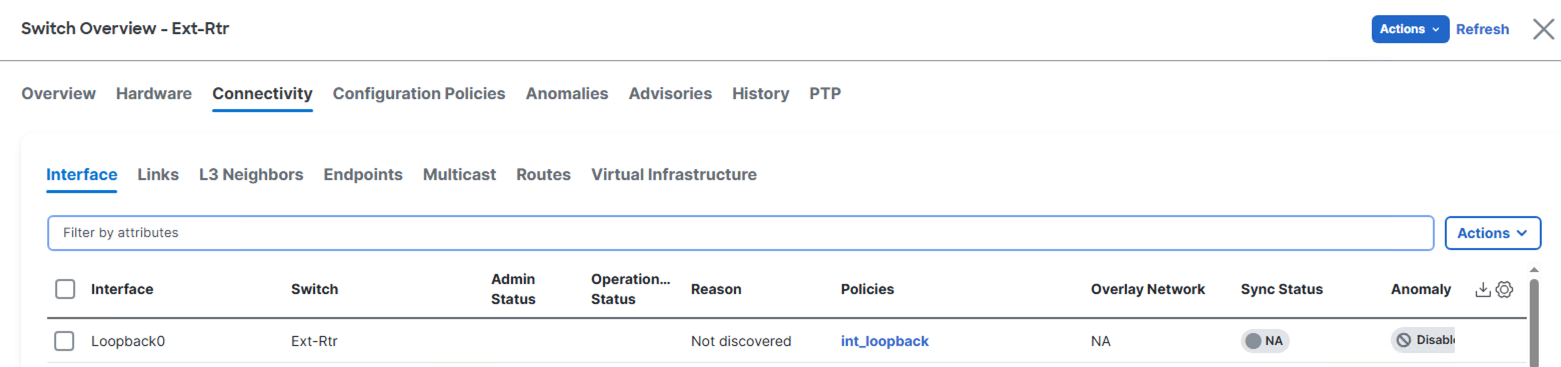
Back at the main Interfaces overview, confirm you see your Loopback0 created. This will be deployed to your Ext-Rtr for advertisement into BGP thus into the VXLAN EVPN fabric as an external route in subsequent sections.