Assign the right roles to ensure each switch receives the optimal configuration for its function.
Nexus Dashboard uses switch roles to determine exactly what configuration to deploy. Each role (Leaf, Spine, Border, Border Gateway) triggers specific templates and best practices.
ND automatically assigns roles during discovery: Nexus 9300 → Leaf, Nexus 9500 → Spine. You only adjust specialized roles.
Most switches are automatically correct, but two need adjustment:
Navigate back to the Inventory view to set the role of the border gateway leaf, Site1-BGW1, correctly:
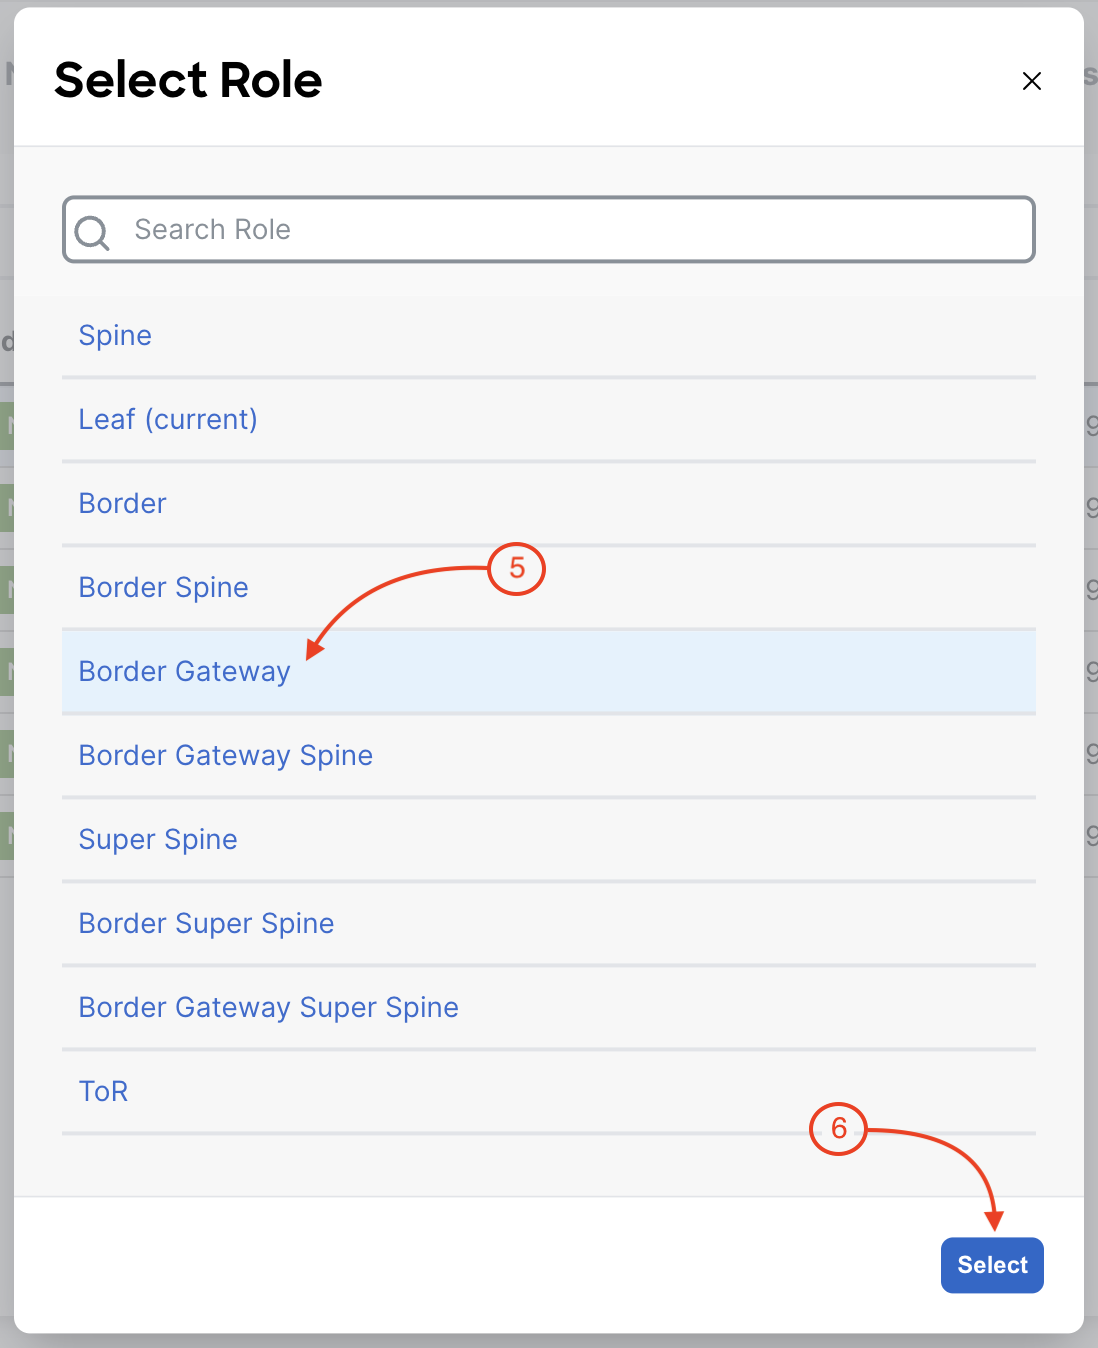
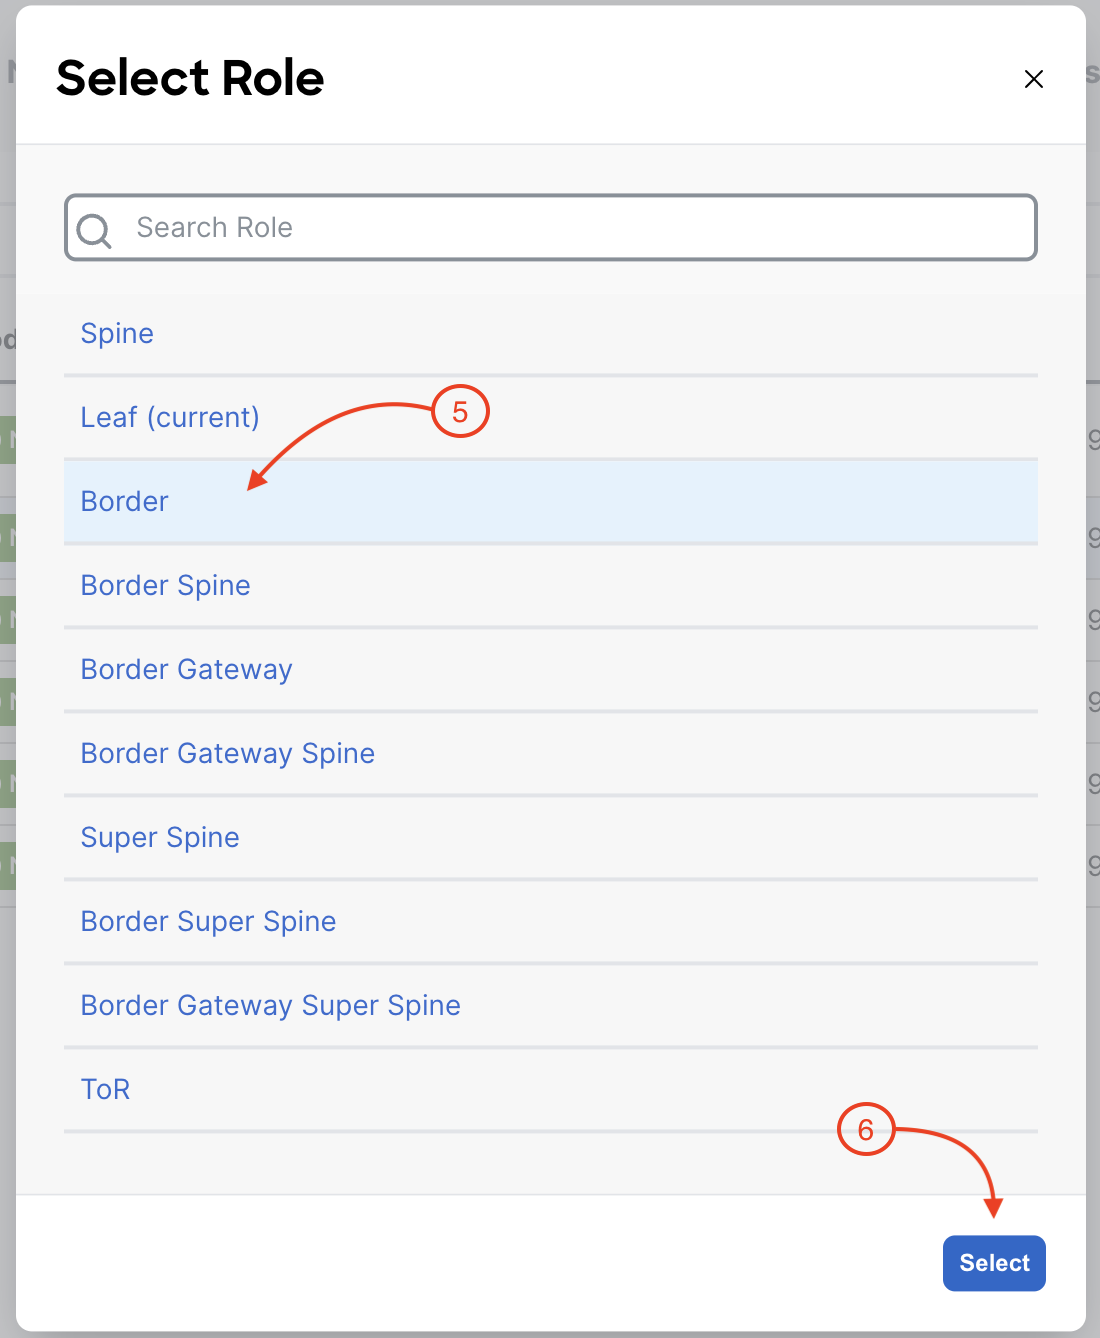
After setting the Border Gateway Leaf role, you will arrive back at the Inventory tabular view. Now set the role of the border leaf, Site1-BL1, correctly:
Review the switch roles that were automatically assigned by NDFC and the roles you set. Again, each switch role will serve a purpose in the type and amount of exact configuration required to be deployed to a given switch.
For further reference, additional details for adding switches can be found here.