Use seed switch discovery to automatically onboard existing production switches with preserved configurations.
Import existing VXLAN EVPN fabric switches using seed switch discovery with CDP hop-count traversal. The seed switch method automatically discovers and onboards connected switches while maintaining all existing configurations.
Unlike Greenfield deployments, Brownfield imports preserve all existing switch configurations. Switches enter migration mode during import and validate that configurations follow Cisco best practices before completing the import process.
For successful Brownfield import into an "Easy" fabric, switches must have VXLAN EVPN configuration already present. The management user requires SSH, SNMPv3, and show command privileges for discovery and onboarding.
Your Switches table is empty at the moment. To populate it with the switches in your Site1 fabric:
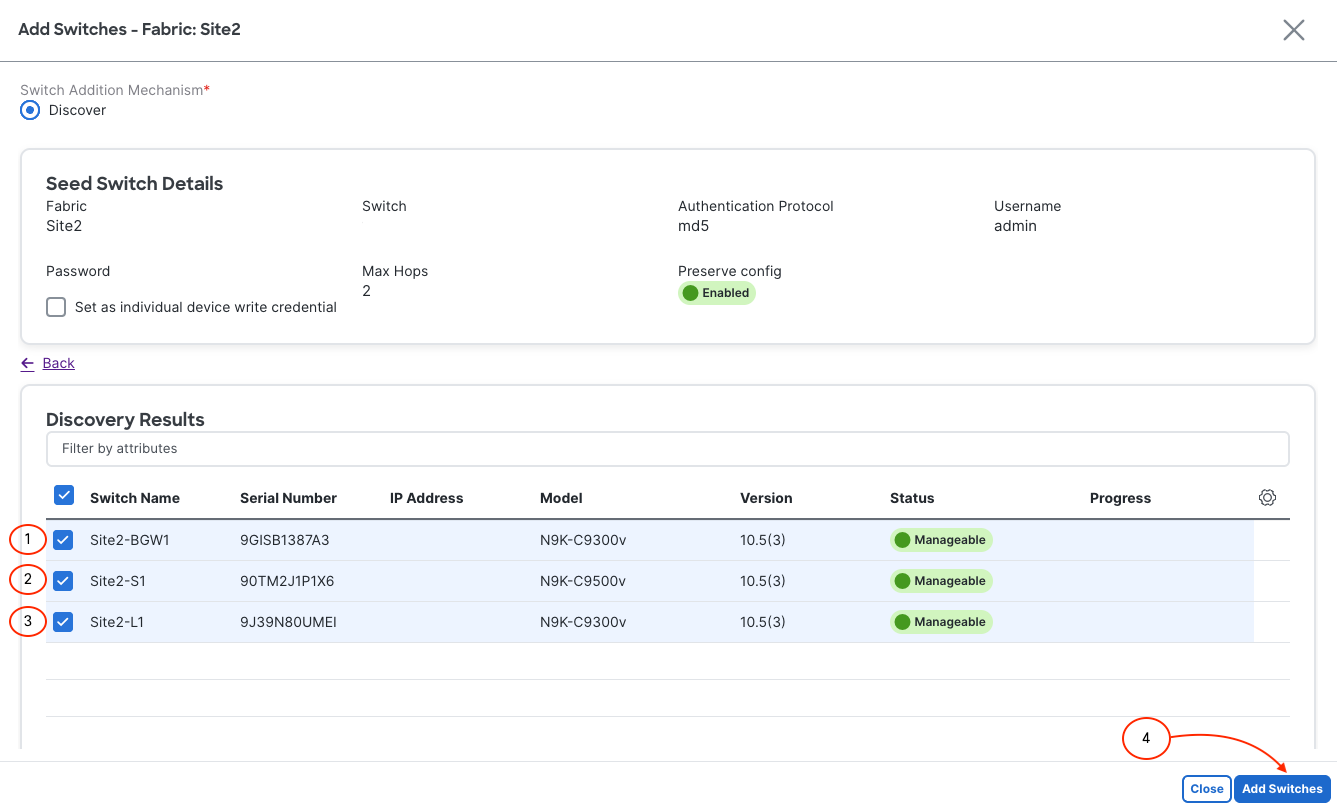
The Add Switches wizard needs some information to automaticaly be able to discover and add switches for management by Nexus Dashboard. Also, since this is a Brownfield fabric, the Preserve Config checkbox will remain checked :
You will see your Site2 fabric switches discovered. Take note that your switches Status column shows they are manageable. They now must be imported.
The import process should be successful and the Status show Switch Added. The Progress column should show the progress bar as fully green, i.e. progress complete and successful. If you see anything different than the screenshot below, plesae notify a lab instructor.
Upon exiting the Add Switches wizard, you will be redirected back the Switches overview. You should now see your three imported switches with the Config Status as showing NA. This is expected at the moment until you perform the Recalculate and Deploy, but first switch roles need to be set.